How to Configure vCenter Orchestrator (vCO)
In my previous article How to install vCenter Orchestrator (vCO), I walked you through a screen-by-screen installation of vCO. The only major item lacking from that previous article is the ever-important configuration steps. In the past, many people have had troubles with getting the configuration of vCO correct. This article is an effort to help walk you through each of the screens to provide you insight and recommendations on how to get vCenter Orchestrator configured and working in your environment.
vCenter Orchestrator Configuration
Let's get started by clicking the "vCenter Orchestrator Configuration" link that was created in your menu, desktop, or quick-launch bar as selected during installation. Your default browser should launch to http://your-lcm-server:8282 . You'll need to login to that screen with the Default Username and Password for vCenter Orchestrator: vmware / vmware 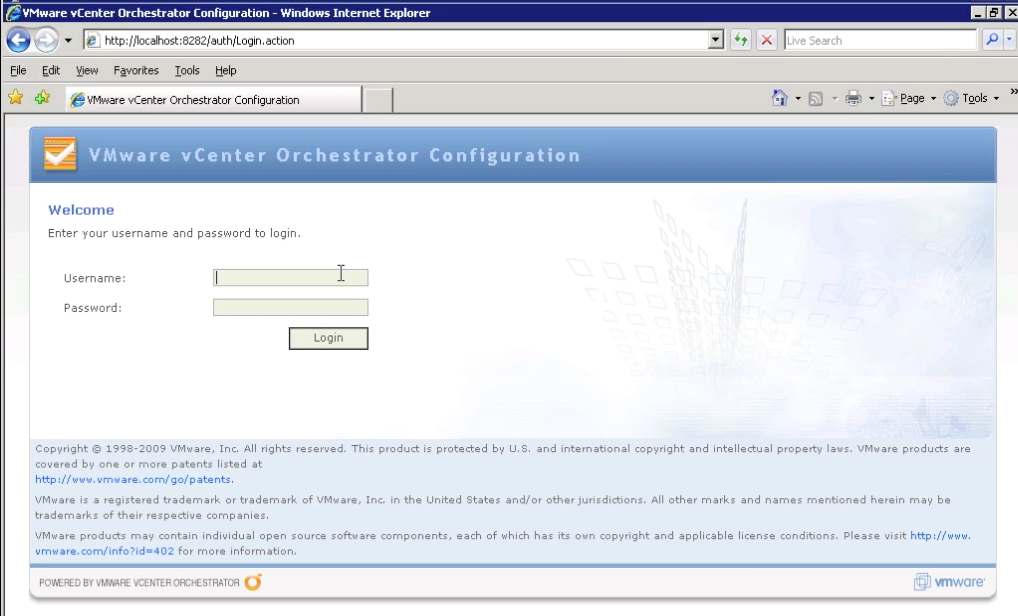
Once you have logged in, you'll be presented with the following screen: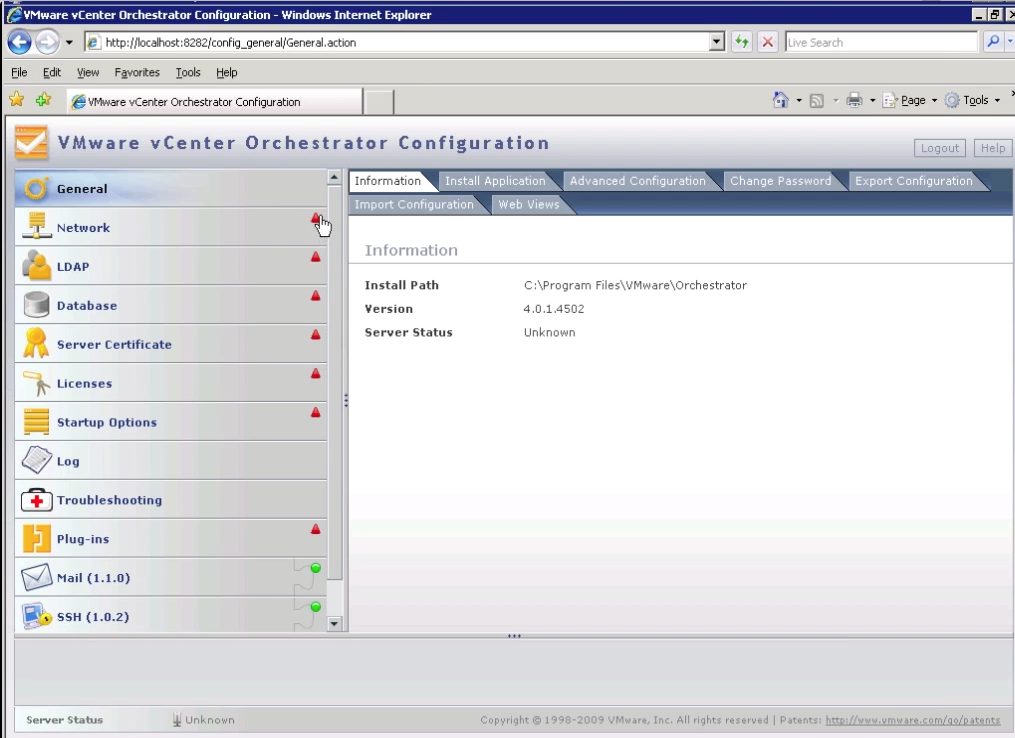
You'll note that there are several red triangles down the left pane of the display. Each of these represent configuration items that must be set. A green circle indicates that the configuration item is either set or not required. We'll go through each of these screens and get them configured so that we get our green dots.
vCenter Orchestrator Network Configuration
Let's start by clicking on "Network" in the left pane.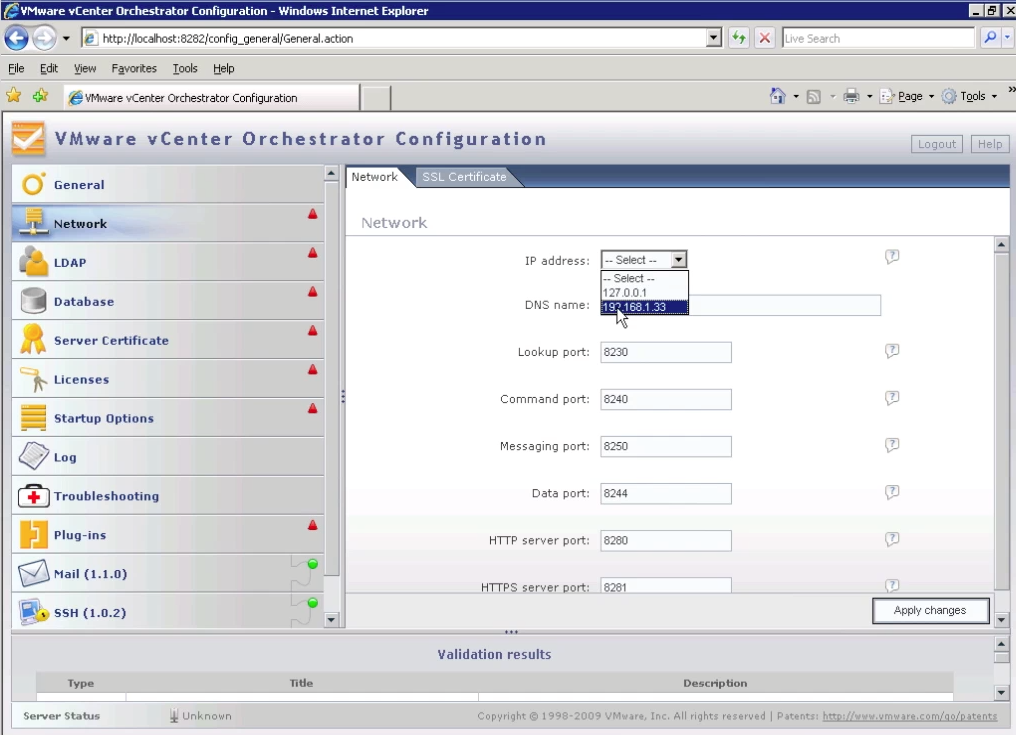
IP address: You'll want to choose an IP Address here so that you can connect to the server. If you specify 127.0.0.1, then the only machine that will be able to connect to it is itself. So, choose the desired IP from the drop-down.. that way, you can connect to the vCO server from another workstation running the vCO Client software.
DNS name: This field will auto-populate based on the IP Address chosen. Please note that it is important to have reverse DNS working in your environment for optimal performance with vCO.
Lookup port, Command port, Messaging port, and Data Port: I recommend leaving all these as their default values.
HTTP Port: The default here is 8280 so in order to access any Webviews you create, or the weboperator, you'll need to enter http://your-lcm-server:8280 in your browser address bar. If you prefer not to have to specify the port in the address, you can safely change this value to 80 as long as you don't have any other web servers already using that port on the server.
HTTPS Port: The default here is 8281 so again, you'll have to specify a port for SSL communication to the vCO server. You can safely change this value to 443 if you prefer to not be required to specify the port as long as you don't have any other web servers already using that port.
After you have adjusting the settings on this screen as desired, be sure to click the Apply Changes button in the bottom right corner. Please note that if you have a display resolution of less than 1024x768, this button may not be visible.
vCenter Orchestrator SSL Certificate Configuration
Now click on the "SSL Certificate" tab at the top of the right pane as shown here: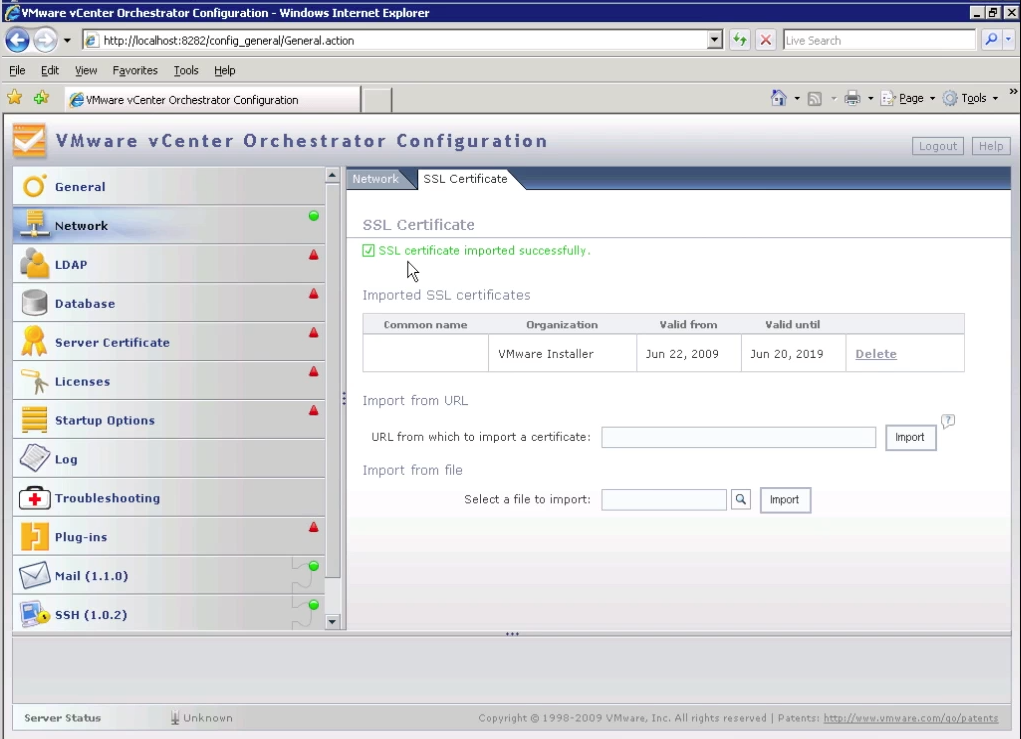
In order to maintain secure communications with vCenter, vCO requires that you import the SSL certificate from each of the vCenter servers you plan on automating with vCenter Orchestrator. To do so, simply enter the IP Address / Hostname / FQDN of each vCenter server in the box titled "URL from which to import a certificate" and then click the Import button. There is no need to enter HTTP or HTTPS in the box, simply the name or address will suffice.
In addition to secure communications with the vCenter server, if you plan on enabling SSL for LDAP (IE: Active Directory), you should also import the SSL certificates from your LDAP server.
After you have imported all the required SSL Certificates, you'll need to restart the vCO Configuration Server. Click on the "Startup Options" tab in the left pane, then click the "Restart the vCO configuration server" link as shown in the following screenshot: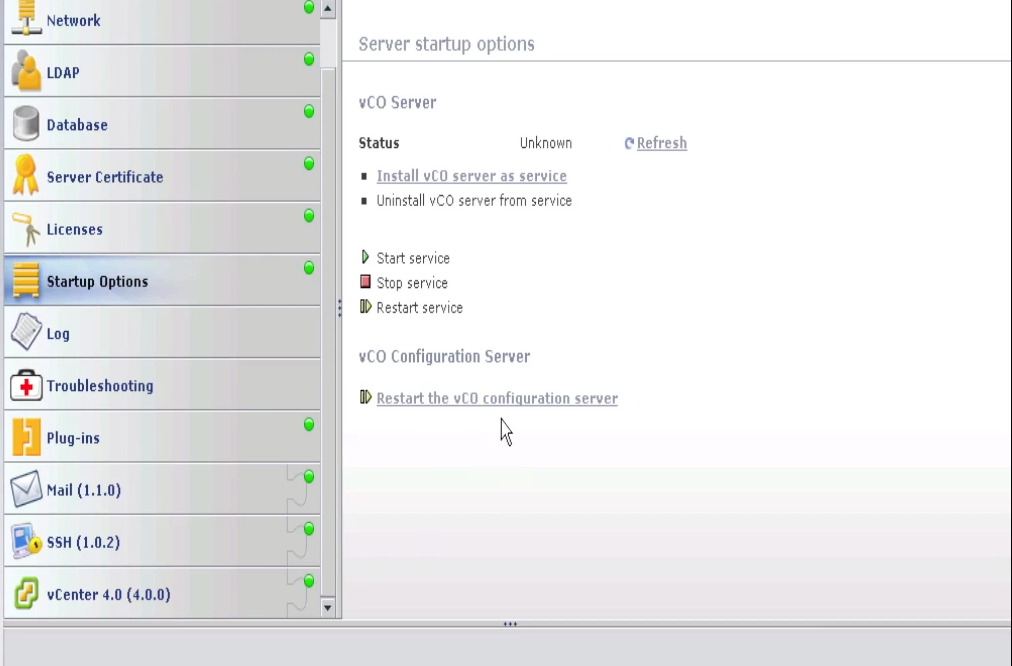
You'll need to log back into the vCenter Orchestrator Configuration interface after the restart has completed. You will then be able to complete the rest of the configuration.
vCenter Orchestrator LDAP Configuration
Click on the LDAP configuration item in the left pane. Next choose the LDAP that you'll be authenticating against. The environment I'm using in this tutorial is using Microsoft Active Directory (Windows 2003) so I'll choose the "Active Directory" option for my LDAP Client. You can choose a different client as needed by your environment(OpenLdap, eDirectory, Sun Java System Directory Server), but some of the syntax may vary slightly in the rest of this configuration page.
Specify your Primary LDAP Host and Secondary LDAP Host, if applicable. Ideally, you should try to use a local Global Catalog server - click on the checkbox to Use Global Catalog if desired.
If using SSL, you'll need to specify the appropriate Port, place a check in the Use SSL checkbox, and be sure to import the SSL certificate from your LDAP server.
For Root, you'll need to use Distinquished Name syntax for your the root of your LDAP tree where vCO should start looking. Many times, this can be the same as your domain name, or geo, depending on your LDAP schema. My environment is quite simple in that I just use "vmware.lan" as my domain. So, my setting here is "DC=vmware,DC=lan". However, if I were setting up a vCO server in each of my GEOs with a naming schema of AMER, APAC, EMEA for example; then being in the US, I would use "DC=amer,DC=vmware,DC=lan" as my Root.
User name: Specify the username that vCO will use to query your LDAP environment. I have found that user@domain.ext works the best here. So, I enter "administrator@vmware.lan" for this field and then specify the appropriate Password for that account.
User lookup base: If all of your user accounts and groups are under a specific OU or CN (Container - Microsoft syntax), then you can use the Distinguished name to that location in both the User lookup base and Group lookup base. In my example domain, I am using the built-in "Users" location for all of my accounts and groups. So, since this is Microsoft's "CoNtainer", I specify "CN=users,DC=vmware,DC=lan" as my lookup base for each of these fields. If you have a regular Organizational Unit, "Accounts" for example, then you could specify as: "OU=accounts,DC=vmware,DC=lan". Repeat this process for your Group lookup base..
vCO Admin group: This field tells your vCenter Orchestrator server which group vCO Administrators should belong to. When a user authenticates, their group membership will be checked against this value and elevated rights will be granted when running workflows, browsing webviews, or using the vCenter Orchestrator Client. You can use the Search link to the right of the textbox to search for your group. The results of the search will be hyperlinks. Clicking on the correct hyperlink will use that Distinguished Name value to populate the vCO Admin group textbox for you! In my environment, the value comes up as "CN=lcmadmins,CN=Users,DC=vmware,DC=lan".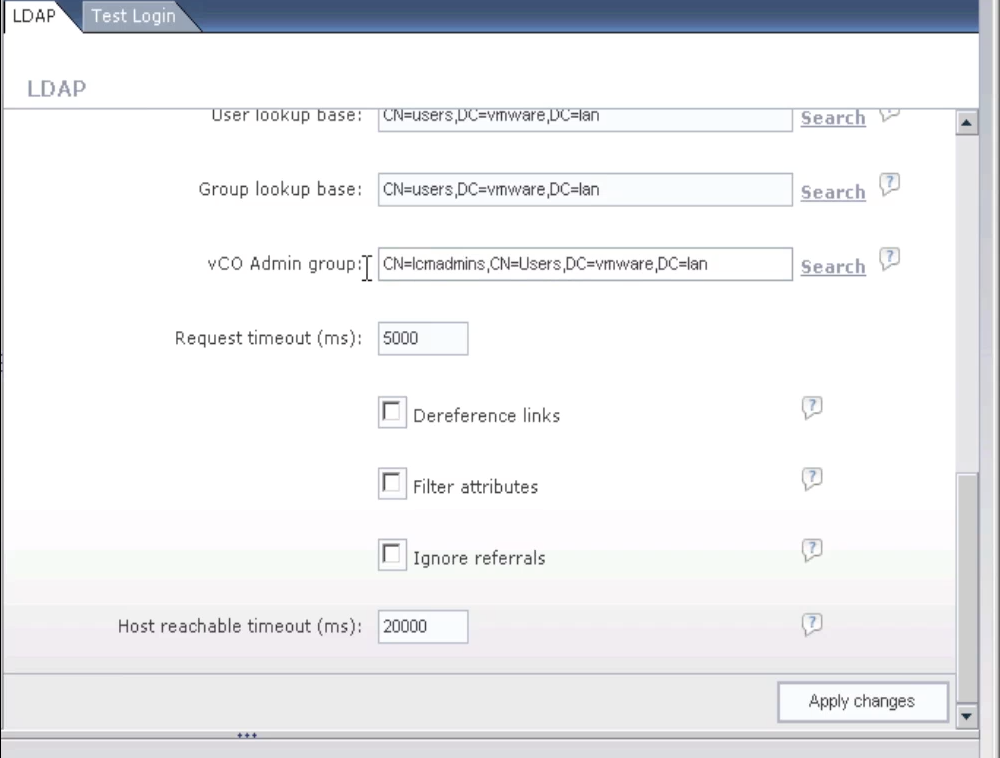
Click Apply Changes when you are done with the LDAP settings. Next, you will want to Test Login with an admin account and a regular user account. Click on the Test Login tab at the top of the right pane, then enter the credentials for a member of your vCO Administration group, your screen should display a success message like the following: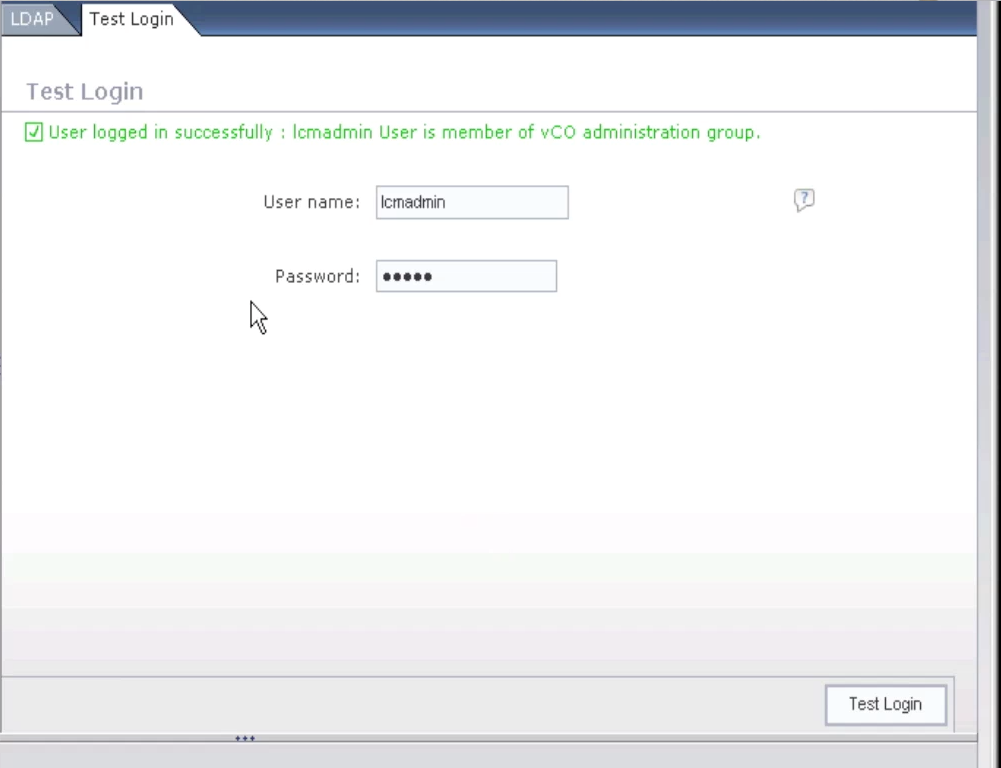
Now test login with credentials of a valid user that is NOT in the vCO administration group to get results like the following: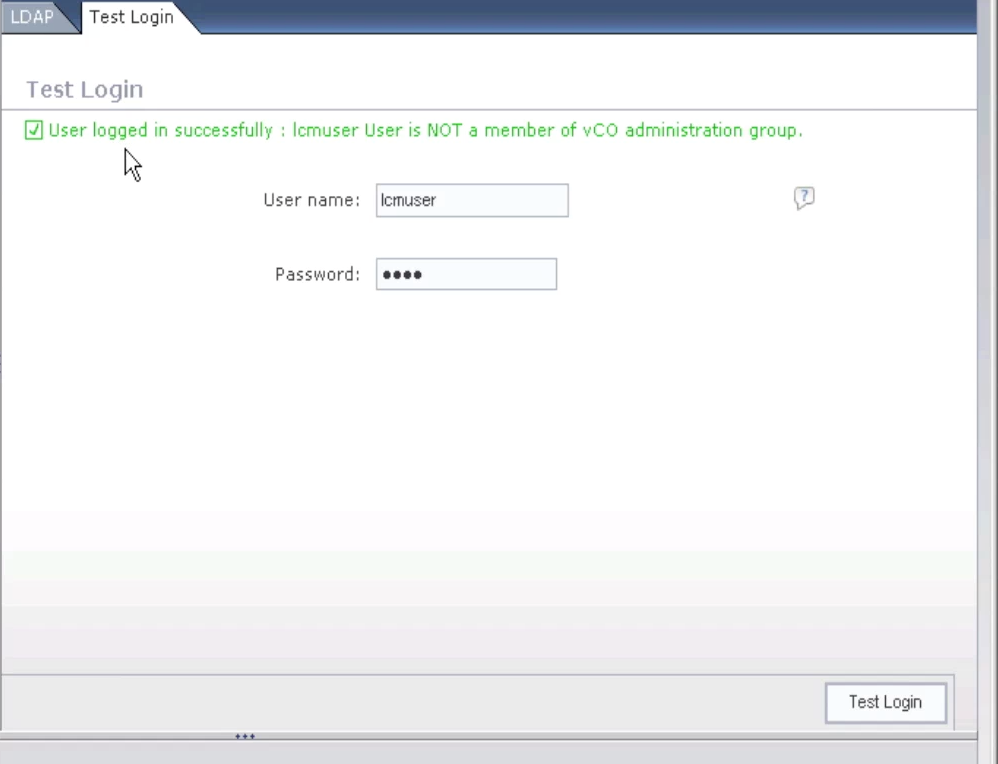
vCenter Orchestrator Database Configuration
We'll need to setup our database connection now to store our vCO data. For this environment, I'm using a SQL 2008 Express (Not supported for Production environments). Choose your database type and fill in the form as required.
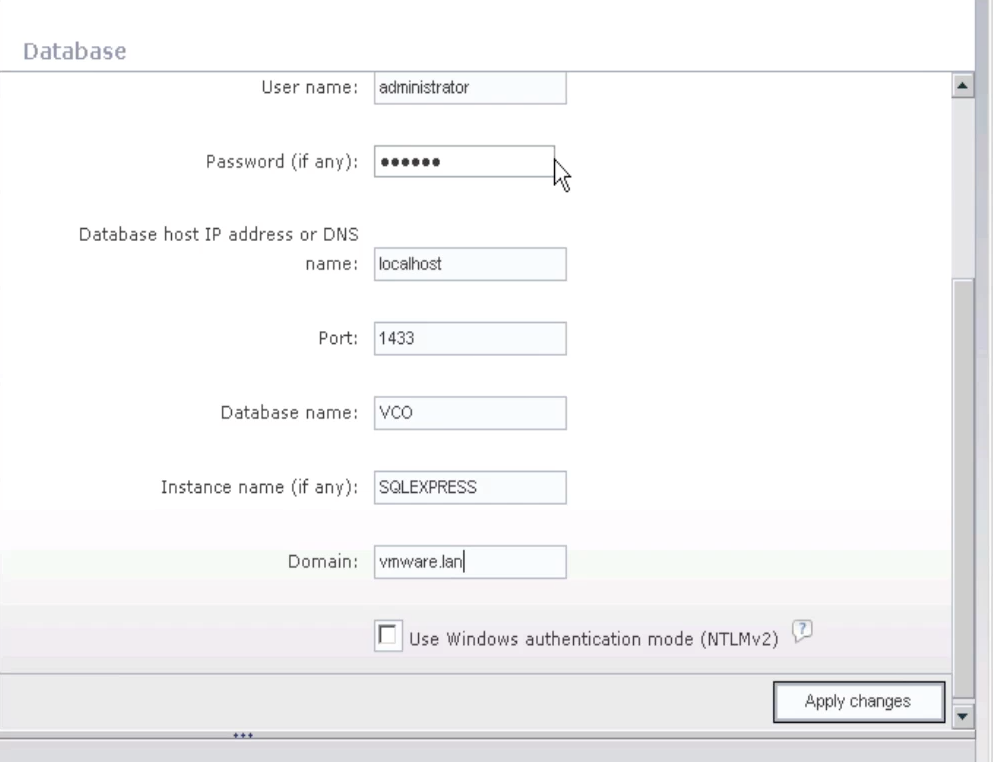
After specifying all the details, you need to click the Apply Changes button at the bottom right of the page. If the server details and credentials were specified correctly, you should get a screen similar to the screenshot shown below. Note that the text in RED is expected: "Database configuration saved successfully. Install the database by clicking the following link." This notice indicates that vCO has successfully connected to the Database Server and that the tables now must be installed.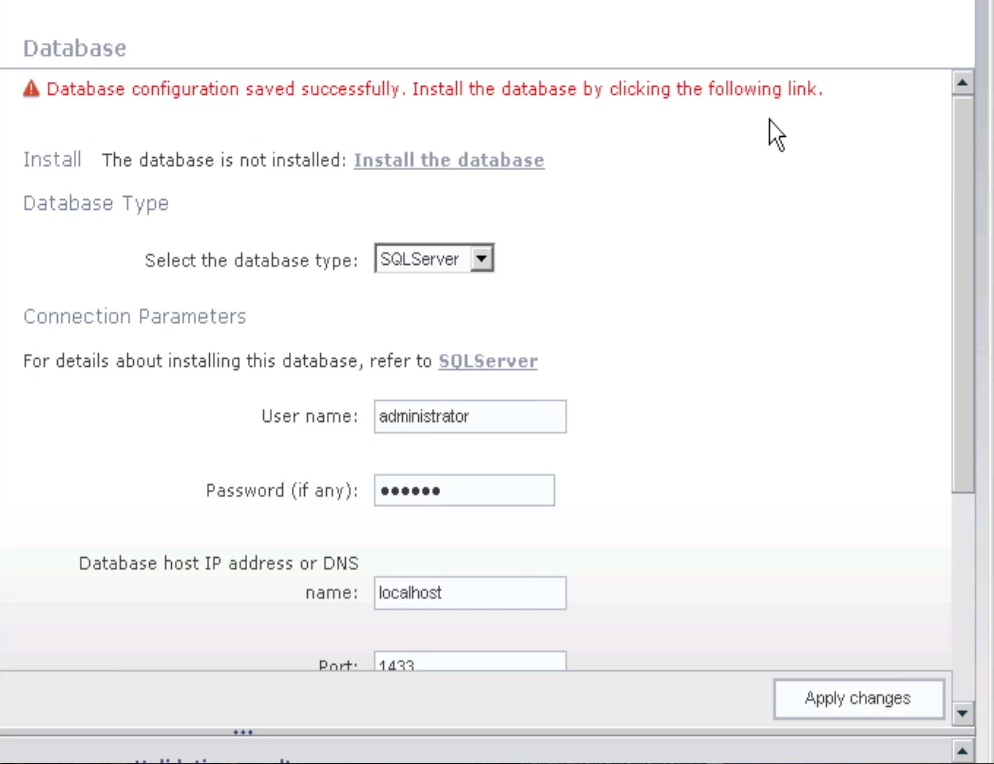
On the line that says Install, there is a link called "Install the database", click on there to install all the tables. You should receive a success message as indicated in the following screenshot: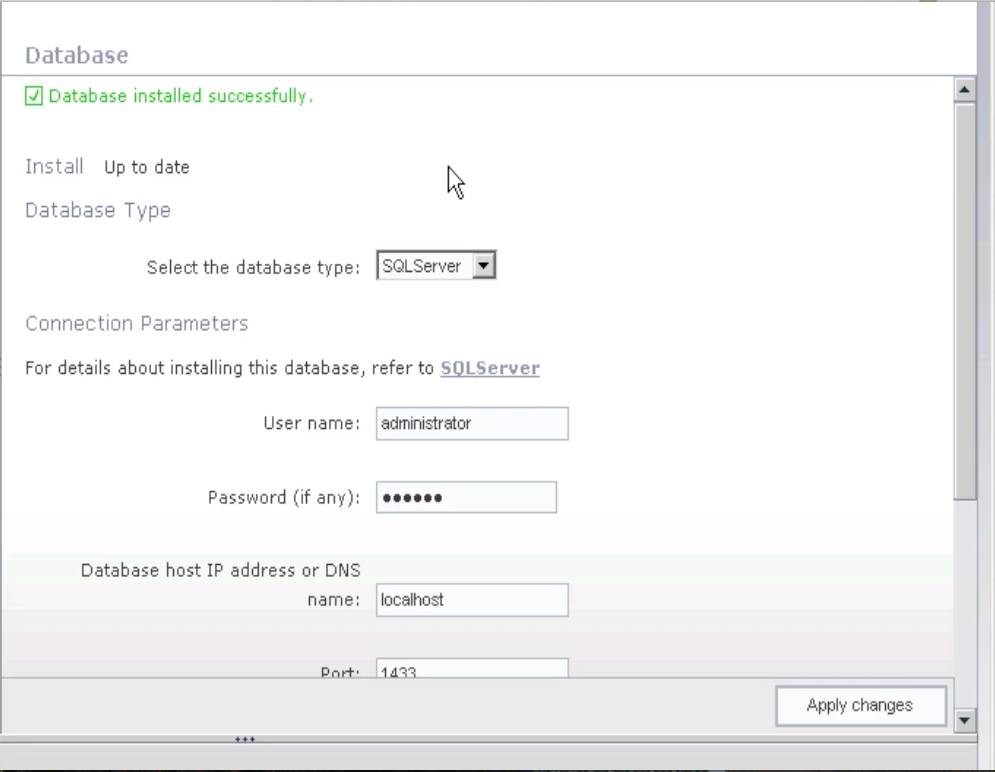
vCenter Orchestrator Server Certificate Configuration
Next up you need to Create/Import your Server Certificate. If you don't already have one (most people won't), then just create one. This certificate is used to sign any packages you create to send to others.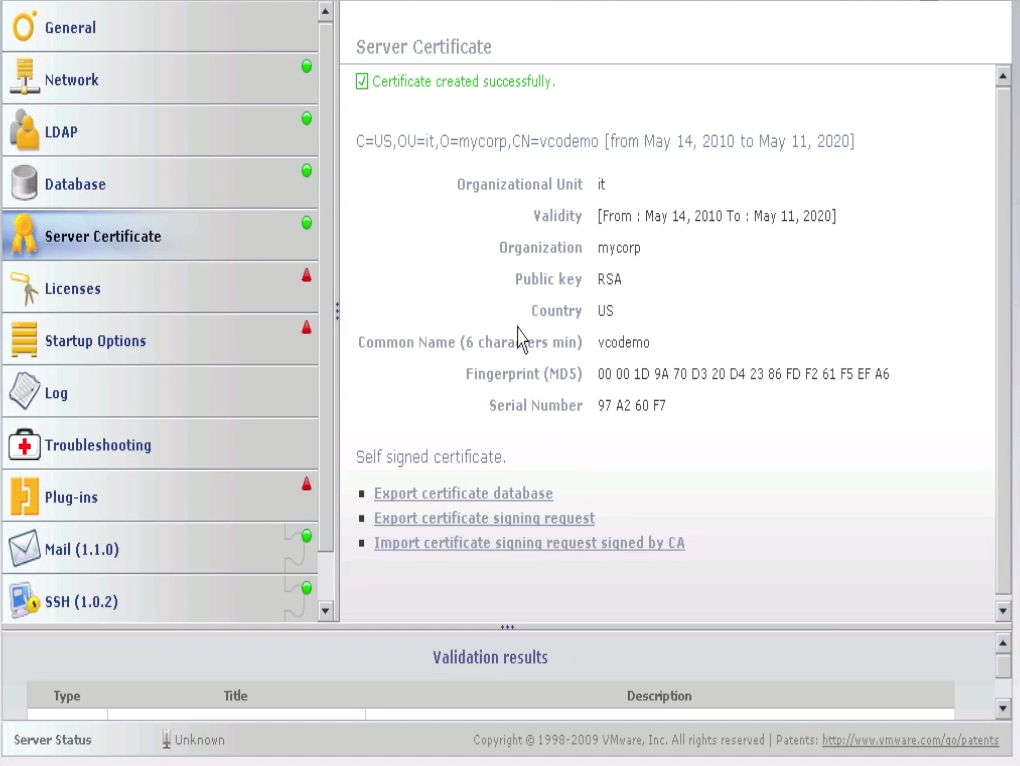
vCenter Orchestrator License Configuration
You'll need to provide your license on the Licenses tab. vCO 4.0.x uses the same license number as your vCenter Server. Please note that if you wish to create/edit workflows you must have a valid license for vCenter Server Standard or above. Lower level versions of vCenter Server will result in Read Only of vCO workflows. You must provide your vCO license BEFORE installing licenses for other plugins/applications - IE: Lifecycle Manager.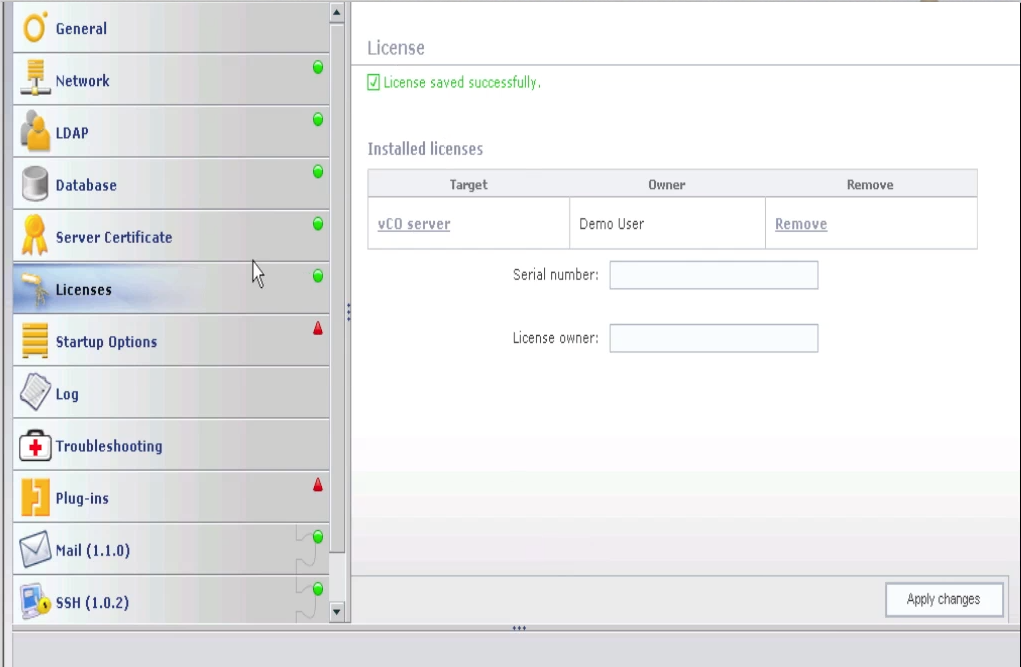
vCenter Orchestrator Plugins Configuration
Click on the Plug-ins tab next and specify credentials for a vCO Admin member. This account will be used to install and execute the appropriate installation scripts and workflows to get the plugins fully installed. Apply Changes when done.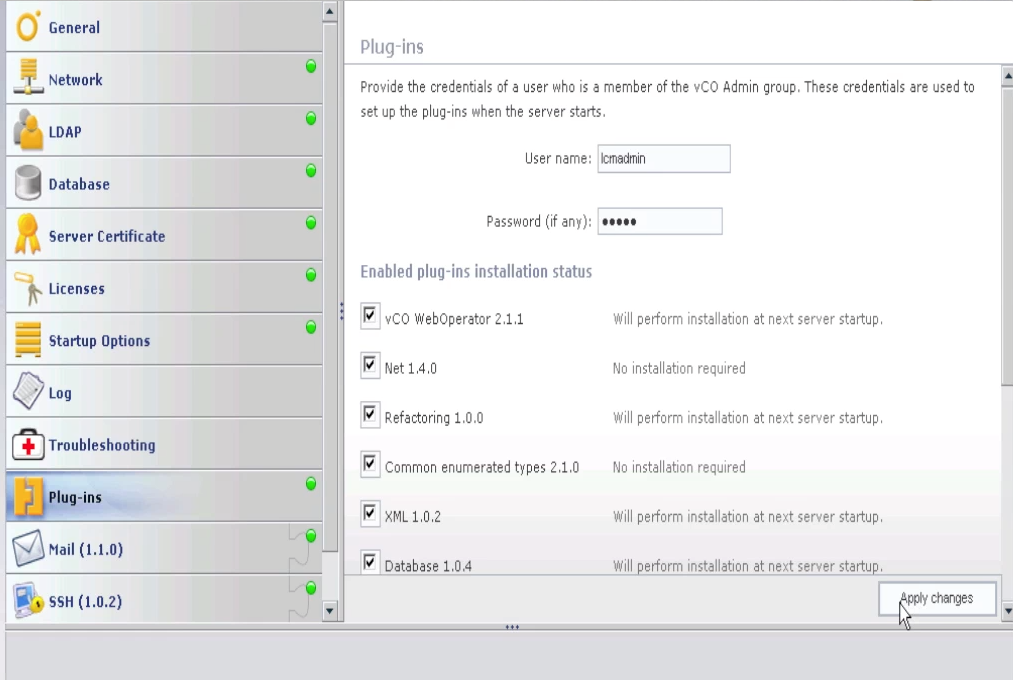
vCenter Orchestrator Mail Configuration
Many of the Mail workflows in vCO can use the Default Mail server values for sending e-mail notifications. If you wish to enable this feature, click on the Mail tab in the left pane, then click the Define default values checkbox and specify the appropriate details to your SMTP server and credentials if needed. Remember to allow the vCO server to send mail through your SMTP server if required.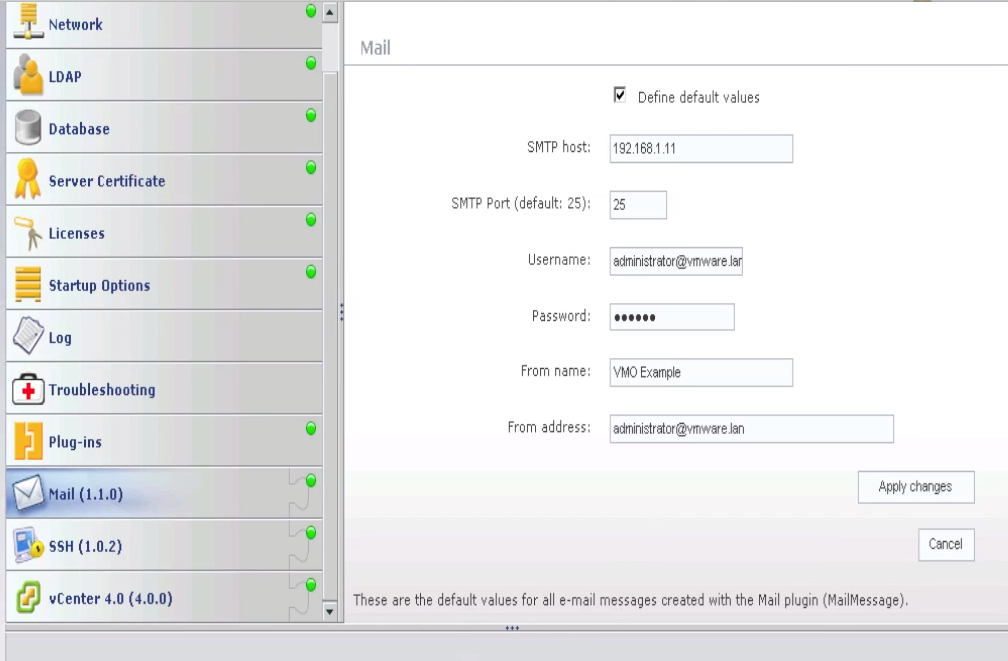
vCenter Orchestrator vCenter Configuration
Next, you should specify one or more vCenter Servers. Be sure to specify "Share a unique session" as that is the recommended best practice. This option keeps a single connection to the vCenter Server for the API calls instead of having each vCO user spawn a connection to the vCenter Server.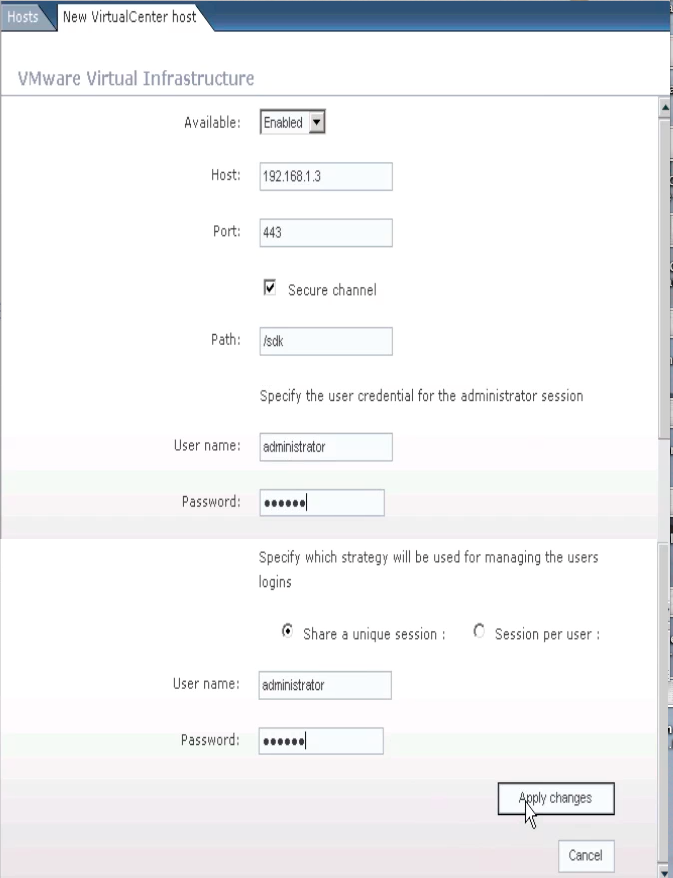
vCenter Orchestrator Startup Options Configuration
By now, all of the little lights should be green so it is time to setup the Startup Options so click there.
Start off by clicking the link "Install vCO server as service"
Once that is completed, click on the "Start service" link as shown in the following screenshot: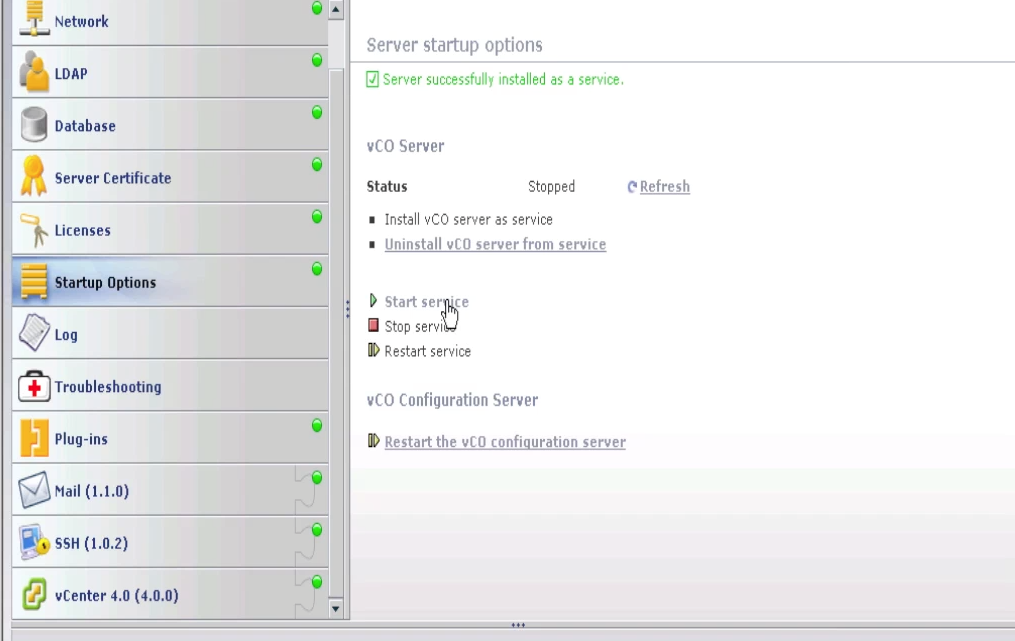
vCenter Orchestrator Export Configuration
After all that work getting things configured, it is a good idea to export your configuration.
Go back to the General tab in the left pane, then click on the Export Configuration tab in the right pane. If you wish to password protect your configuration, enter one in the text box. Click Export when you're ready.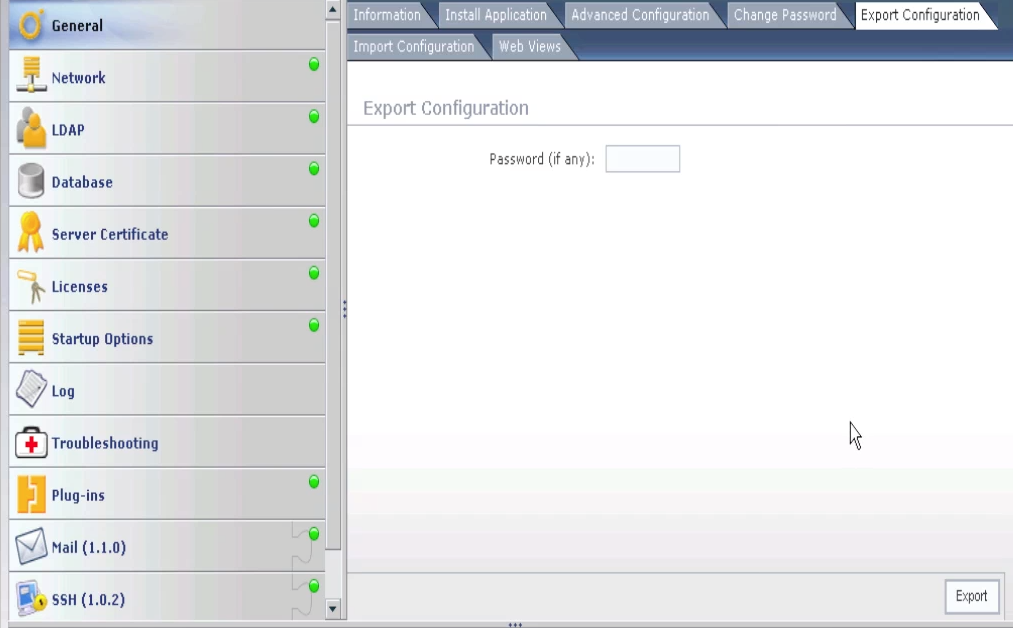
vCenter Orchestrator Client Login
You should now be able to launch the vCenter Orchestrator Client and connect to your vCO server.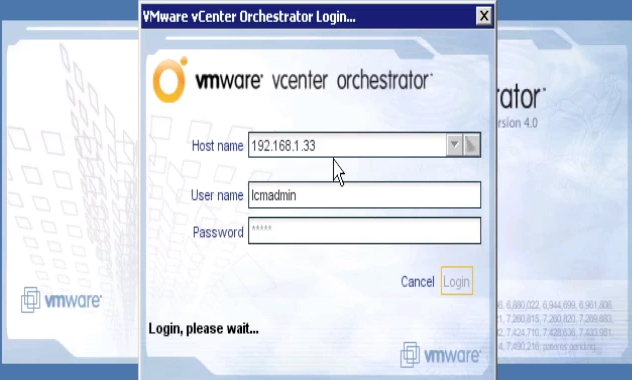
After logging in, you should have a screen like this: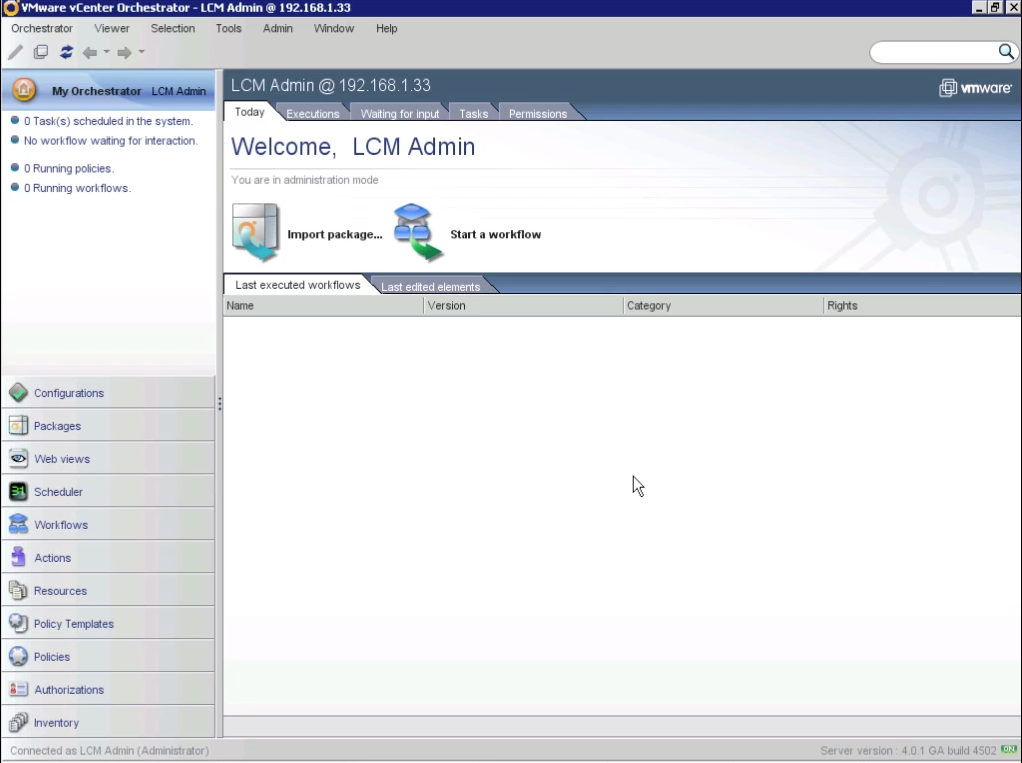
Under Workflows, there is a library of many sample workflows that you may use to build your own solutions :)
This completes the Configuration of vCenter Orchestrator.

