SQL Plug-in + DynamicTypes = Simple CMDB for vCAC - Part 3
Welcome back! This is the third article of a multi-part series that steps you through the process of exposing our workflows from the last article to vRealize Automation’s (vRA) Advanced Service Designer (ASD).
Introduction
This third article will cover the following topics:
- How to add the simple CMDB to vRealize Automation’s Advanced Service Designer
- Add a Day 2 operation to delete an Asset from our table
Future article will cover the following topic:
- How to add entries to the CMDB via vRealize Automation Infrastructure as a Service (IaaS) workflow
Let’s get started - Login to vRA with your Tenant Admin credentials. (NOTE: Be sure that your account has the “Application Architect” role assigned since you will need to have the “Advanced Services” tab available to you in vRA.)
Advanced Services - Custom Resource
Custom Resources map to vRealize Orchestrator Inventory Object types. In the previous articles of this series, we introduced a new Object Type named DynamicTypes:MyCMDB.Asset. We must add this to vRA so that the object is something that can be requested and, more importantly, managed. By managed, I mean that it will be a provisioned resource that is visible on your Items tab in vRA and can have Day 2 operations assigned to it.
Add Resource
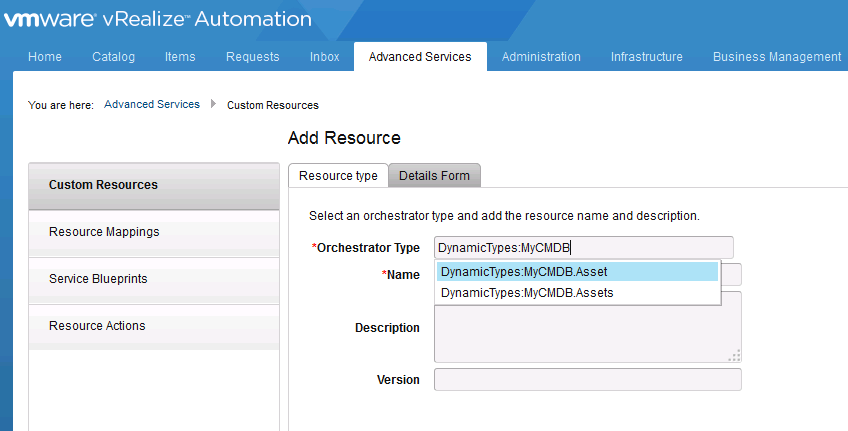
- In vRA, navigate to Advanced Services -> Custom Resources
- Click on the Add button to add the new Custom Resource
- When the page loads, enter “DynamicTypes” in the Orchestrator Type field - you should see a number of object types populate
- Select the “DynamicTypes:MyCMDB.Asset” entry as shown in the screenshot above
- Provide a Name as you wish it to appear in vRA
- Optionally provide a Description and Version
- Click Next
NOTE: If you have just added new Dynamic Types to the Orchestrator server that vRA is using, they may not show here right away. If this is the case, you can force vRA to “refresh” its view of available DynamicType objects by:
- Go to Administration -> Advanced Services -> Server Configuration
- Change your server configuration from one option to the other (for example, if set as “Use the default Orchestrator server,” change to “Use an external Orchestrator server” and vice-versa. Even if you have a single Orchestrator, that is fine - just change between default/external or external/default) - Click Update
- Now change back to your original setting and click Update
- This process essentially reconnects vRA to the Orchestrator API and refreshes the list of available DynamicTypes Object Types
Add Resource - Details Form
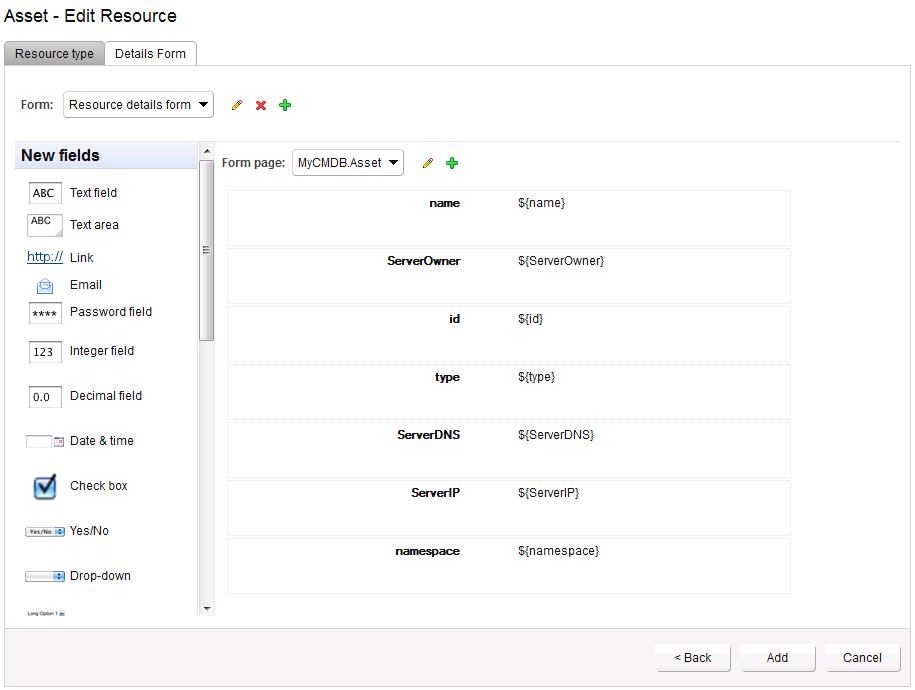
There is no need to change any fields here as they are not displayed to your users. Just click the Add button.
Now that vRA understands what a MyCMDB.Asset is, we need to provide a means for the users to actually request it. This means we need a Service Blueprint.
Service Blueprint - Workflow
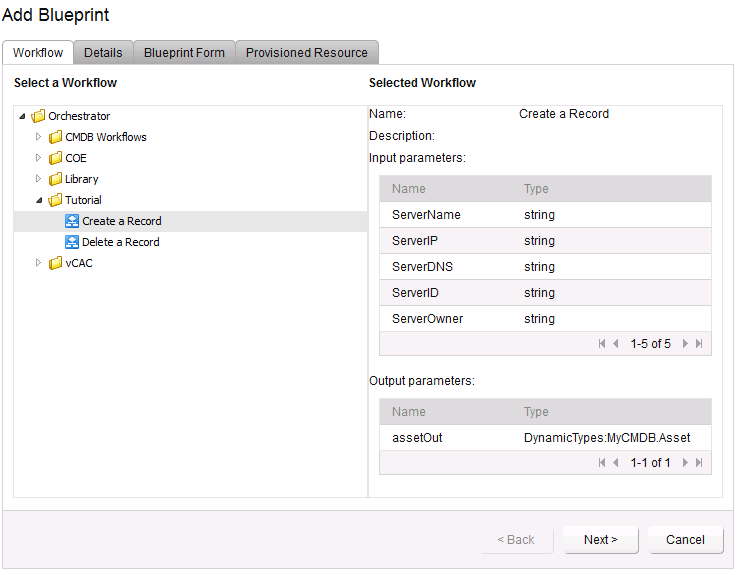
- Click on the Service Blueprints link on the left of your vRA page (still on the Advanced Services tab)
- Click the Add button to define a new Service Blueprint
- Expand out your Orchestrator server and locate your Create a Record workflow created in the previous article
- Select it and click Next
Service Blueprint - Details
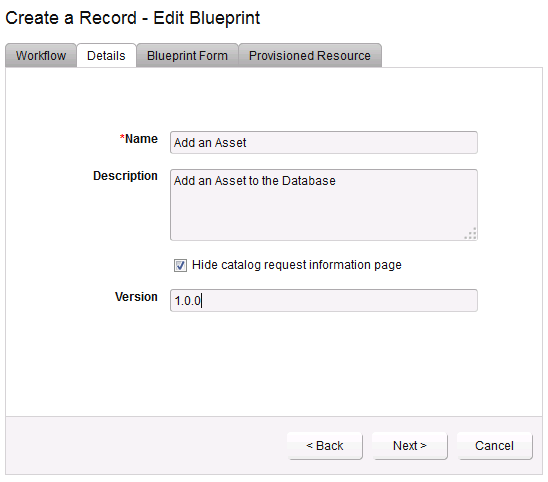
The Name and Description on this page are what your users will see when viewing the Catalog so make these user-friendly.
- Change the Name field “Create a Record” to something like “Add an Asset” or “Request an Asset” or whatever is to your liking. For this tutorial, I will change it to “Add an Asset”
- If you wish to hide the catalog request information page (typically not needed), place a check in the box
- Optionally add Version info (NOTE: If adding Version, must be in format of major.minor.micro[-revision] for example 1.0.0 OR 1.0.1-1)
- Click Next
Service Blueprint - Blueprint Form
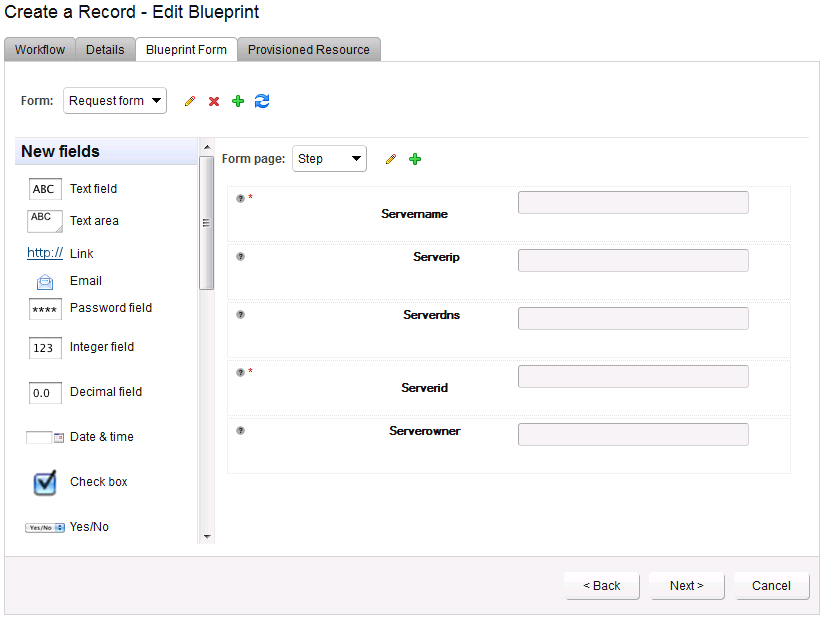
The Blueprint Form is the actual form your users will fill out after they click on the Request button of the Catalog entry.
You may leave the form as-is or customize the Display name of the inputs and/or hide or set default values. At the very least, be sure to mark your required inputs as described in the “NOTE” below. Notice how the two “Required” fields are indicated with a red *. NOTE: VERY IMPORTANT - The fields you specified as ID and NAME (in my case, Serverid and Servername respectively) MUST be filled out in order for the DynamicTypes to work properly. Failure to enforce this will result in a broken inventory. During the workflow creation in vRO, we specified these two fields as being mandatory but this input property did not carry over to the form designer. It is highly recommended to:
- Mouse-over the Servername input field, then click the edit icon (pencil) that appears to the far right
- Click on the “Constraints” tab of the pop-up window, then change “Required” to “Constant” with a value of “Yes”, then click Submit
- Repeat the steps above for the Serverid input
Click Next when done modifying the form
Service Blueprint - Provisioned Resource
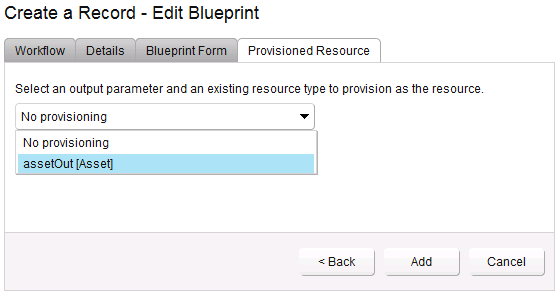
In some cases, you may want to allow vRA to present a request form that runs an Orchestrator workflow that does not result in a provisioned/manageable resource. However, this tutorial is not one of those cases. We want the result of a request to be visible in our Items tab so we must identify a Custom Resource that will be created when the workflow has been completed.
- Click the Drop-down box and select the “assetOut[Asset]” entry. This is the Output field of the workflow we selected. We can choose it here because it has the same type as a Custom Resource we defined earlier in this article.
- Click Add
Service Blueprints - Publish

Once a Service Blueprint has been created, it is immediately placed in “Draft” status. This means it will not be available as a catalog item to be assigned to services. Before navigating away from this page:
Select the “Add an Asset” row, then click the Publish button
Confirm that the Status of that row changes to Published
We still need to Add this Service Blueprint/Catalog Item to a Service so that it may be entitled, but let’s go ahead and add our Day 2 operation while we’re still in the Advanced Services tab first.
Day 2 Operation - Delete Record
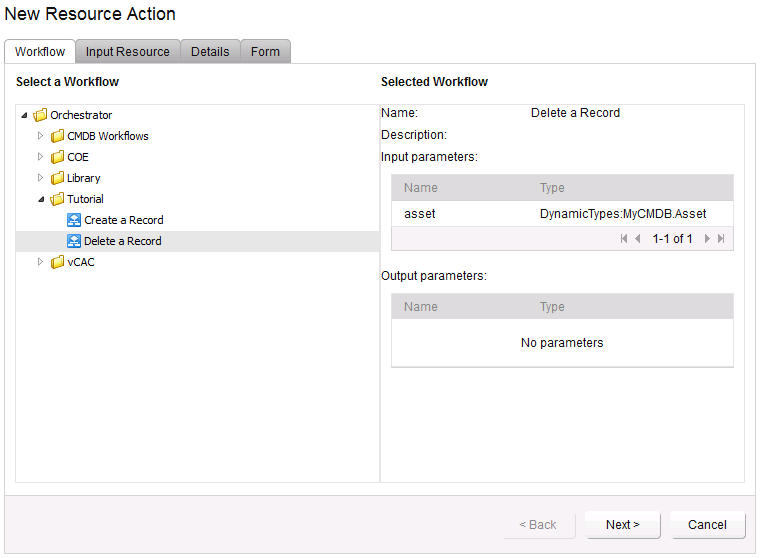
Click Resource Actions, then click the Add button to create a new one.
This time for Select a Workflow, select your Delete a Record workflow and click Next
Day 2 Operation - Input Resource
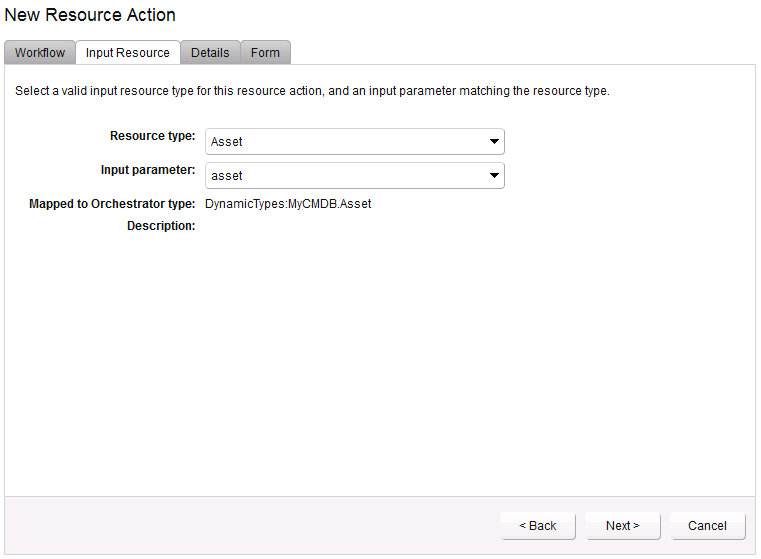
The Resource type and Input parameter should already be selected as “Asset” and “asset” respectively so click Next
Day 2 Operation - Details
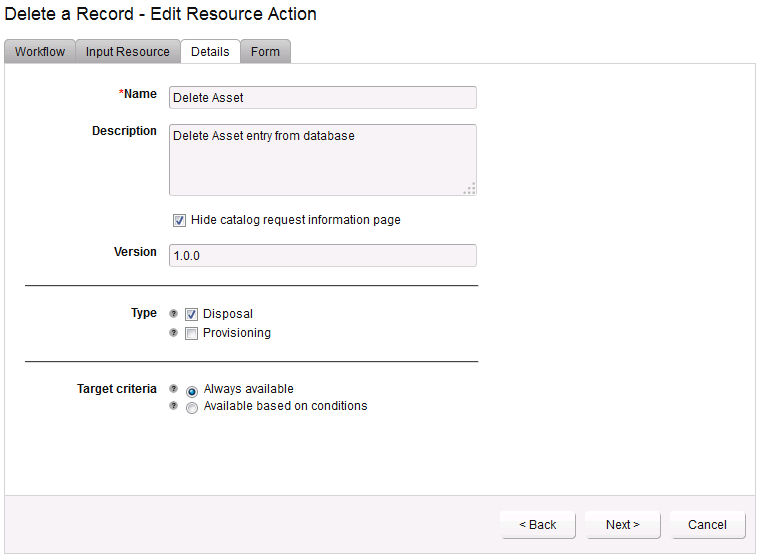
The Name specified here is what users will see as an avaialble action for the selected resource.
- Change the value to something appropriate. For the purpose of this article, I will change mine to Delete Asset
- You may optionally Hide the catalog request information page ( I will ) as well as set a Version
- For Type, be sure to tick the Disposal field so that vRA knows that the provisioned Item is being disposed
- Leave Target Criteria as the default
- Click Next
Day 2 Operation - Form
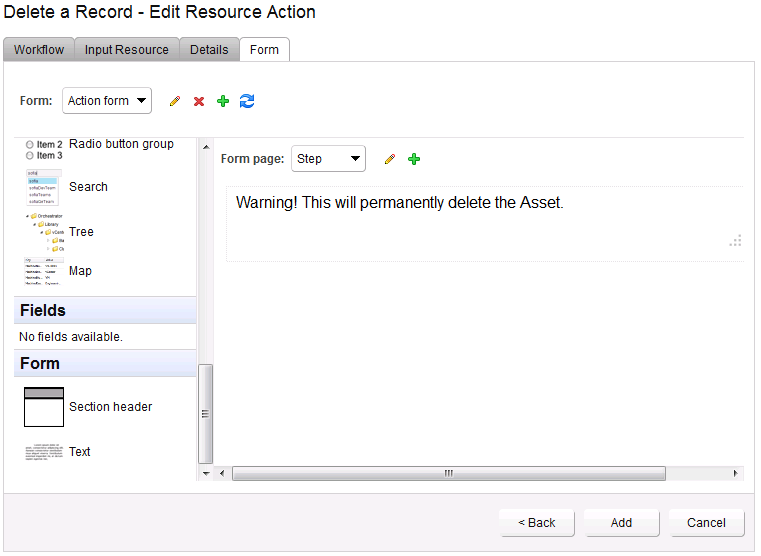
Although the workflow input is already set for the Asset, it may be a good idea to provide some text here as a warning.
Scroll to the bottom of the left pane until you see the “Form” section.
Drag a “Text” piece to the right pane where it says “Drag an item from the palette”
Click the Edit (pencil) icon for the Text, change the Size to Large, and for text enter your warning text.
Click Add when done (when prompted for the empty form action, click OK)
Resource Action - Publish

Like the Service Blueprint, the default status of a newly created Resource Action is Draft so select it and click Publish.
Services / Entitlements
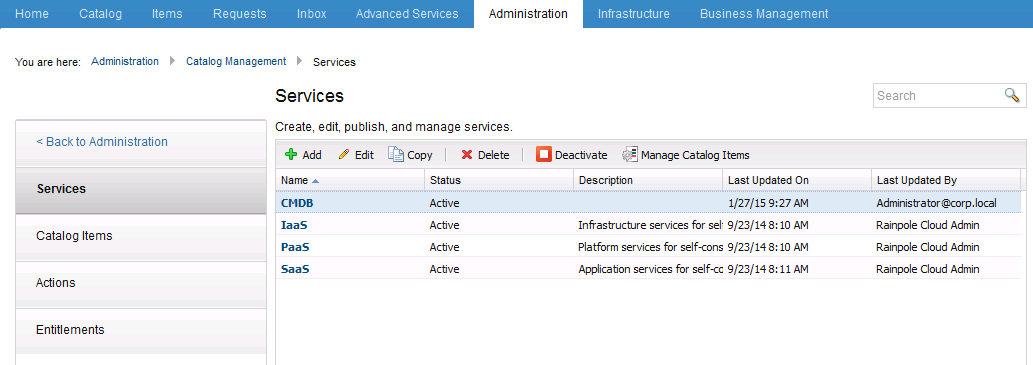
Okay, so we have a new Service Blueprint/Catalog Item and a Resource Action, and they’re both published, but at this point nobody can request or do anything with the Asset. The final steps to get this functional are to:
- Add the Catalog Item to a Service
- Entitle the Service (if new) and Resource Action
To keep this new offering separate from my existing services (IaaS, PaaS, and SaaS), I will create a new Service called CMDB
Under Administration -> Catalog Management -> Services, click Add to create a new service named CMDB and Activate it.
Select your newly created Service (or an existing one if you already have one to use)
Click the “Manage Catalog Items” button
Services - Manage Catalog Items
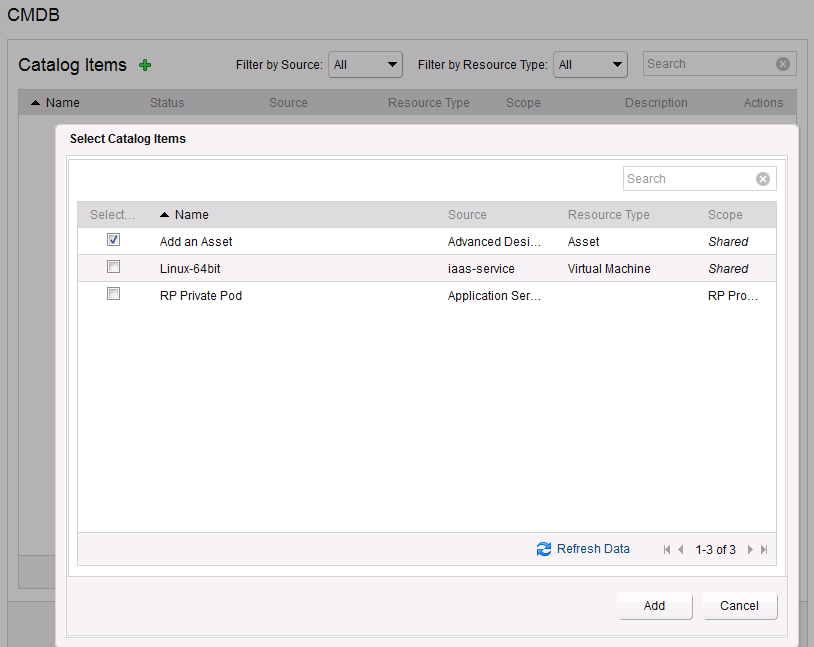
Click the Green + to add Catalog Items to this service
When the pop-up window appears, select the “Add an Asset” item we created earlier in this article (If it does not show, perhaps you forgot to Publish it)
Click Add when done
Entitlement
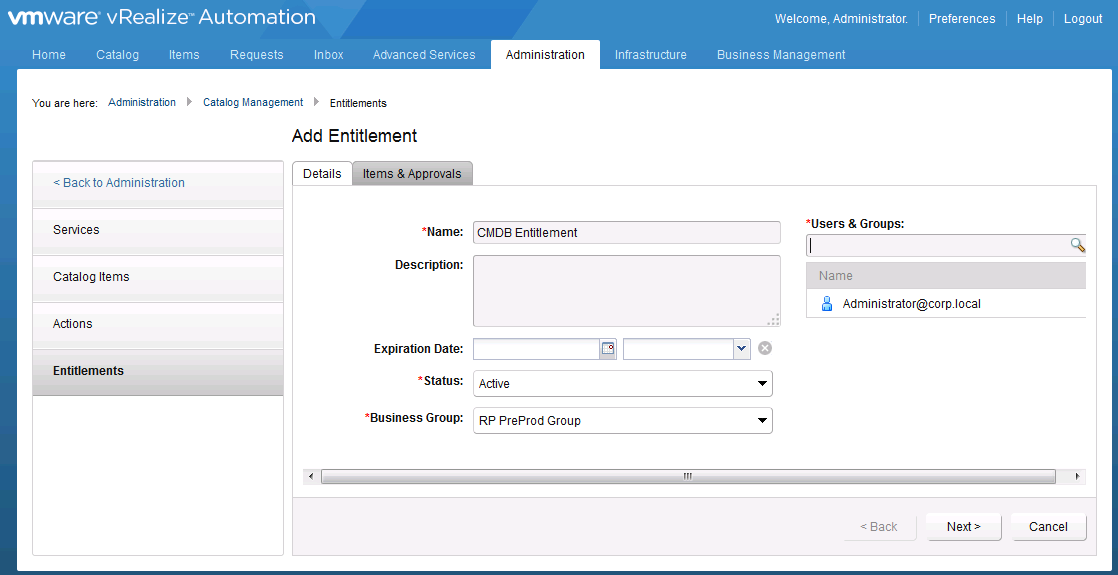
If you have an existing Entitlement you wish to use, go ahead and add the Catalog item and Resource action to that Entitlement.
Navigate to Administration -> Catalog Management -> Entitlements , then click the Green +Add button to create a new Entitlement if not using an existing one.
Give your new Entitlement a meaningful name, I’ve chosen “CMDB Entitlement”
Set the status Active
Select the Business Group you wish to entitle the CMDB services to, I’ve chosen “RP PreProd Group”
Finally, Select one or more Users & Groups - you’ll need to type a name and press Enter to see the selection list show
Click Next when done
Entitlement - Items & Approvals
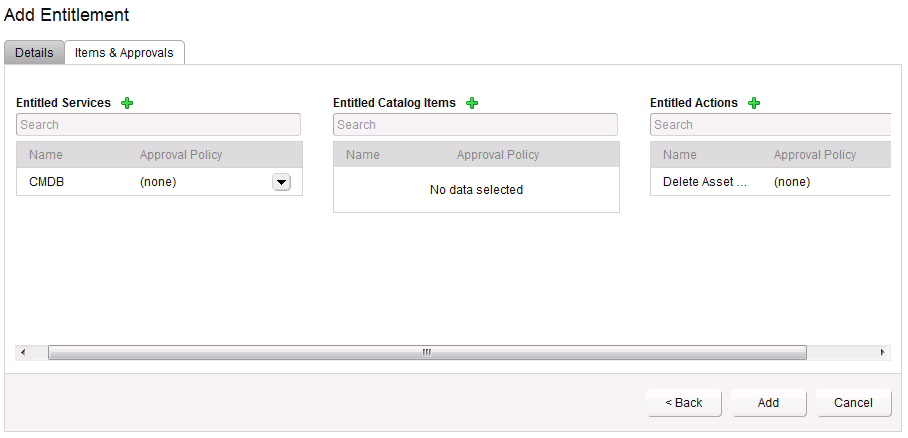
On the Items & Approvals tab, you can specify which Services, Catalog Items (if not assigned to a Service), and Actions to include in the Entitlement. You can optionally specify an approval policy for each as well.
Next to “Entitled Services”, click the Green +, then select the recently created Service “CMDB”
Next to “Entitled Actions”, click the Green +, then select the recently created action “Delete Asset”
Click Add
Catalog - CMDB
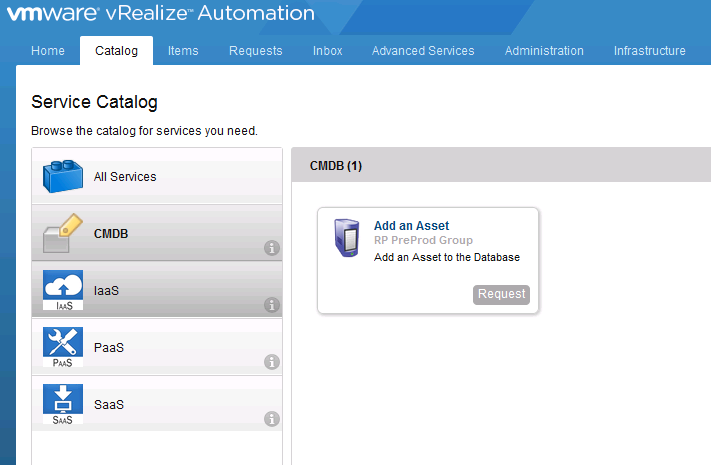
You are now ready to test the solution!
- Be sure you are logged in with an account that has been entitled and click on the Catalog tab, then selct your CMDB services group
- Click Request on the Add an Asset Catalog Item
Catalog - New Request
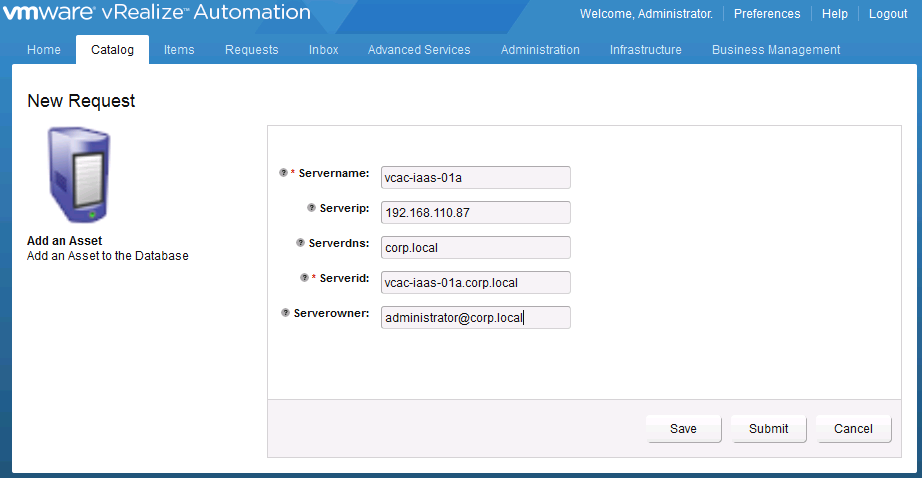
Fill out the form as desired and click submit!
Items - Dynamic Types
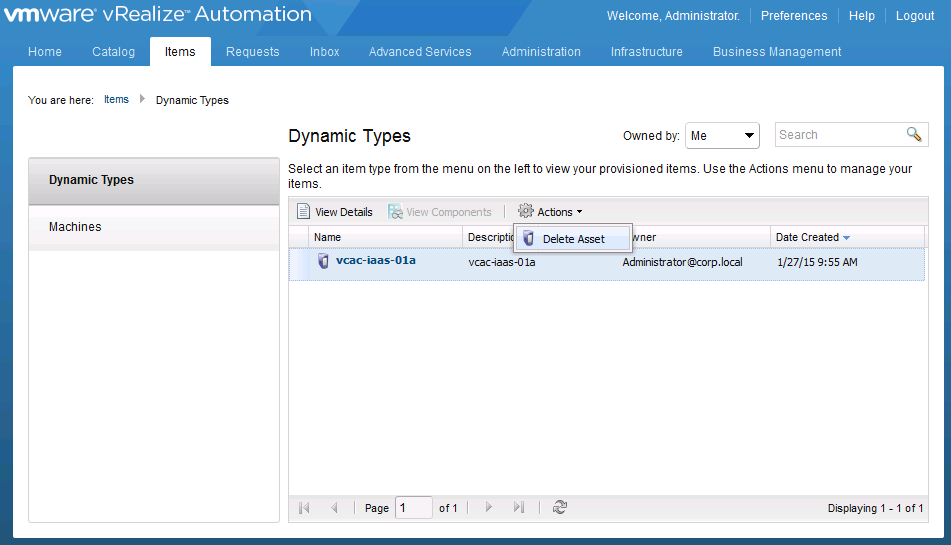
Click on the Items tab
(If you don’t immediately see your requested item, give it a moment, then cick the Refresh icon at the bottom of the window
Select the row of your new item, then click the Actions button - a list of all your Day 2 operations/Resource Actions that have been entitled for you on this object type will be shown - Don’t click Delete yet!
Click the View Details button or the Name of your item to view the item details.
Item Details
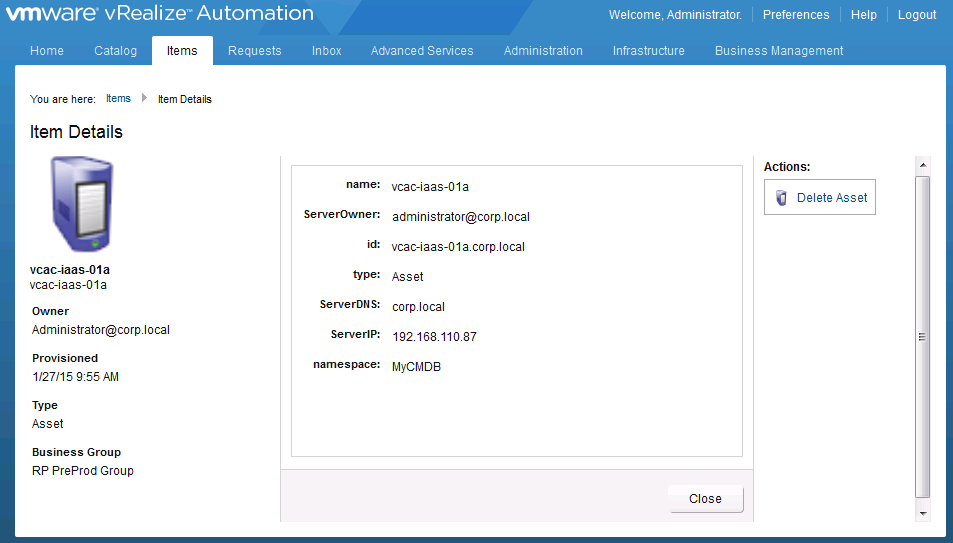
On the details page, you can see more information on the request.
On the right-side of the screen, all entitled Resource Actions for the object type provisioned will be shown.
Go ahead and click on the Delete Asset link now.
Delete Asset
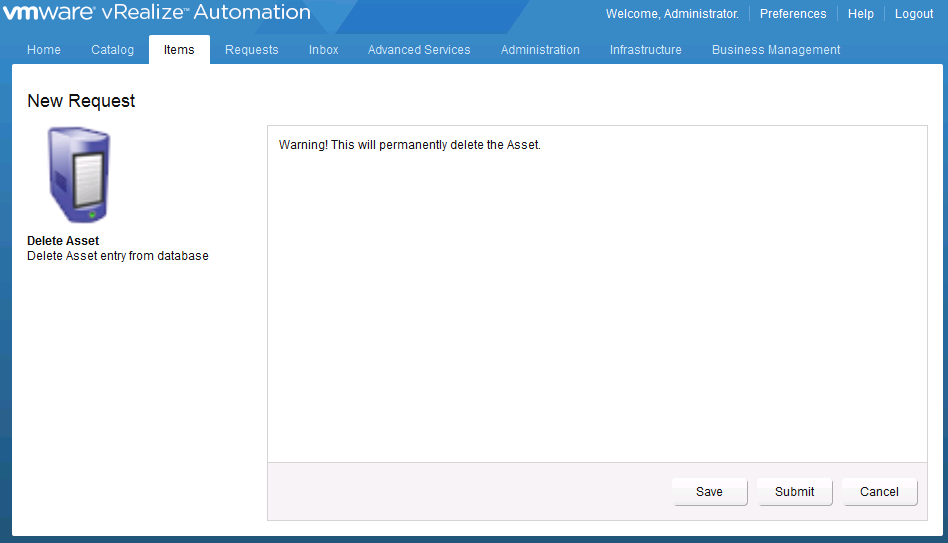
Notice how the warning text we provided earlier is now shown.
Click Submit to delete the provisioned item.
It will take a minute or so for the item to be gone from vRA. If desired, click the Refresh button at the bottom of the page to verify the item has been deleted.
vRealize Orchestrator - Completed Workflows
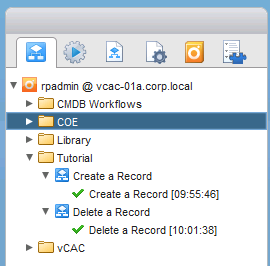
During the course of this article, we Requested an Asset and later deleted it. The engine behind the Request/Delete operations was Orchestrator and the workflows we created in a previous article.
If you log into your Orchestrator client and check your “Create a Record” and “Delete a Record” workflows, you will see completed workflows as shown above.
Wrapping up
This concludes the third article in the series.
Previous Articles in series:

