How to allow the vCO Appliance to write files to a Windows CIFS share
A frequent question around vCenter Orchestrator is: Can I read/write to shared folders? The answer is always yes, but the documentation may be difficult to find - especially when you are referring to a Windows share - aka CIFS in samba and *nix mounting terminology. Read on to learn EXACTLY what you need to do to allow your vCO server to read/write to a Windows Share!
Overview:
vCO allows limited access to its local filesystem. The access is determined by the js-io-rights.conf file found in /etc/vco/app-server/ folder on the appliance. The file should contain some default settings that allow the server to perform its daily operations. If you wish to allow vCO to read/write to the local system, no problem, follow the syntax in that file to add access to a folder named /orchestrator for example with the following line:
+rwx /orchestrator/
When making changes to this configuration file, you must restart the vCO Server service in order for the changes to take effect.
Now how about network shares? Well, don’t consider using UNC paths - mount the remote filesystem to a local folder on the appliance so that you have a local path that may be added to your js-io-rights.conf file. When mounting that remote filesystem, things to consider:
Access rights - restricted per user? Guest access? Read Only? Read/Write?
Mount type? NFS, CIFS, etc…
This article’s focus is on CIFS since that seems to present the biggest challenge to vCO users.
POC Use-Case:
Client has a Windows server (in a domain) with a folder shared out to a service account to be used by automation systems for placing files
Provide step-by-step instructions on how to configure and test vCO’s ability to write file(s) to a CIFS share provided by the Windows server
The following steps were performed using a file share created on a Windows 2008 R2 Domain controller and a vCO Server 5.5.1 GA Virtual Appliance:
Windows File Server:
- Create a shared folder named “cifs-share” (whatever name as you desire, just using “cifs-share” as example for this article for consistency)
- Grant a user read/write access to the share (in this case, we are using a domain user named ldev with a password of VMware1!)
vCO Appliance:
- Create empty folder in /mnt for the CIFS mount in the vco home directory: i (note: these steps could instead use /mnt/cifs-share if desired) chmod the folder to 755:
chmod 755 /var/lib/vco/cifs-share - Update /etc/fstab to automatically mount the cifs share:
//192.168.110.10/cifs-share /var/lib/vco/cifs-share cifs username=ldev,password=VMware1!,rw,file_mode=0777,dir_mode=0777 0 0
NOTE: This cifs mount must be referenced by IP address. FQDN does not work.
The password may need to be escaped with quotes if it contains spaces. Additional, optional parameters to the above line could include:
-
nounix,iocharset=utf8,sec=ntlmv2 -
Modify js-io-rights.conf to allow Read/Write/Execute for the folder:
+rwx /var/lib/vco/cifs-share
NOTE: Be careful of the ordering of lines in this file as they are read in order. (This means you may need to re-arrange the lines if the permission doesn’t work)
-
Restart vCO Server service:
service vco-server restart -
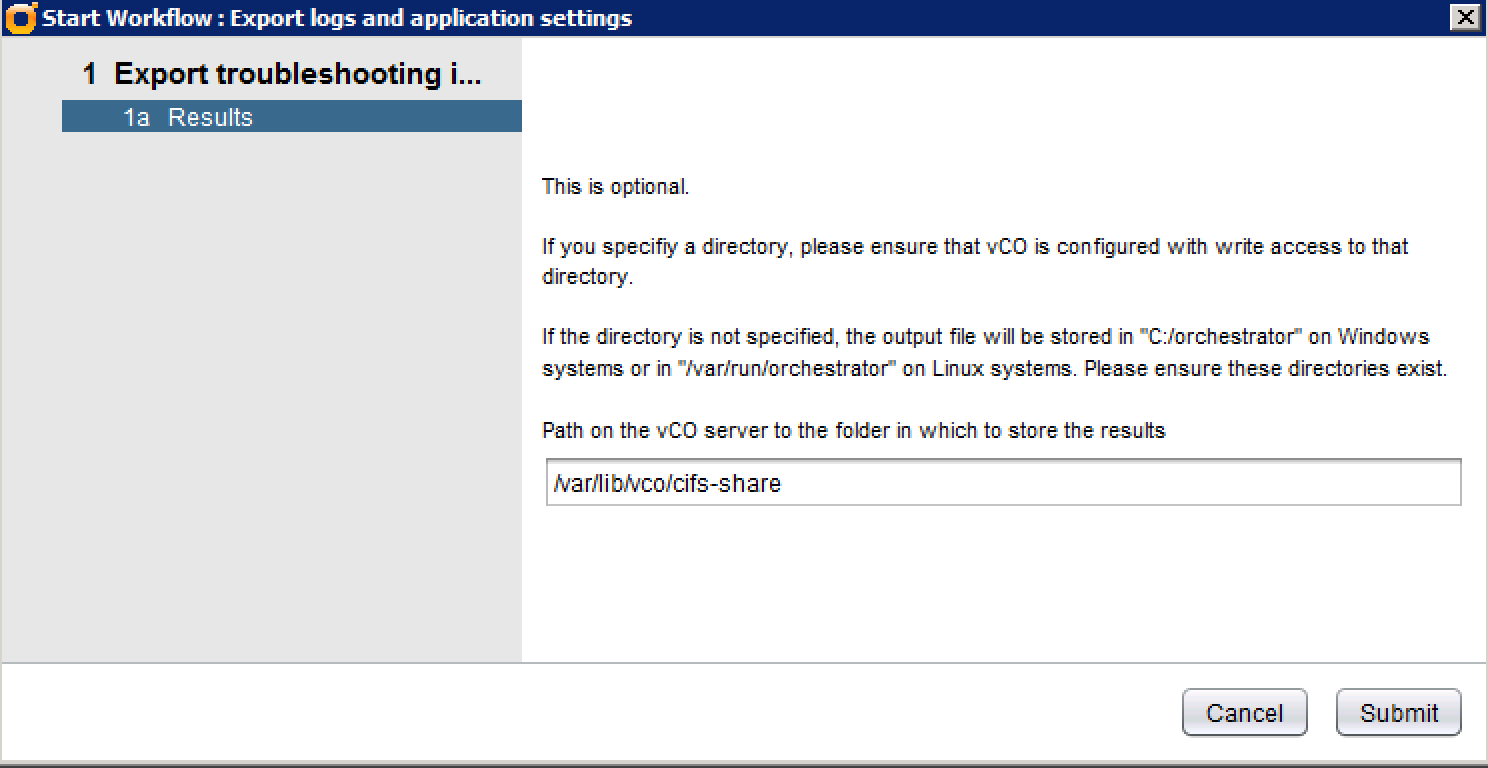
Test: Use the Export logs and application settings Library workflow to confirm vCO is able to write to the folder. When launching the workflow, specify the full path to the mounted folder. In this example, that would be
/var/lib/vco/cifs-share

Exported Logs and Application Settings
This screenshot above shows the input for the library workflow. This particular workflow uses a number of calls to export files and generate a zip file to the specified folder. In this case that folder happens to be a CIFS share that was mounted to the vCO appliance. Take a look inside the code of this workflow to learn more about how the code works.

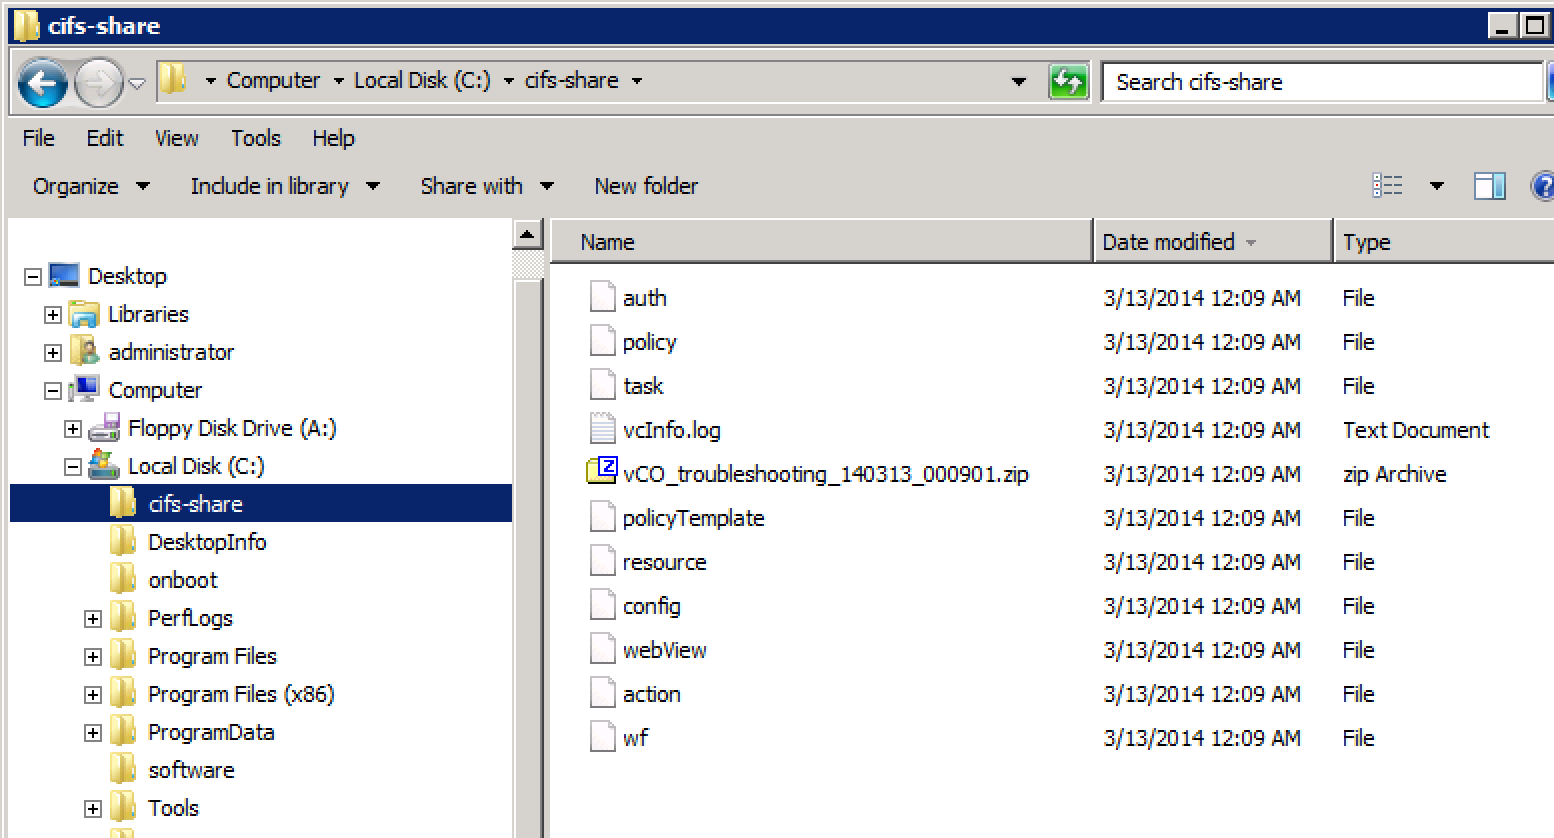
vCO generated files in CIFS Share
The screenshot above shows the cifs-share on the Windows File server has several files that were written by the vCO server directly to this share via the mount that was configured.

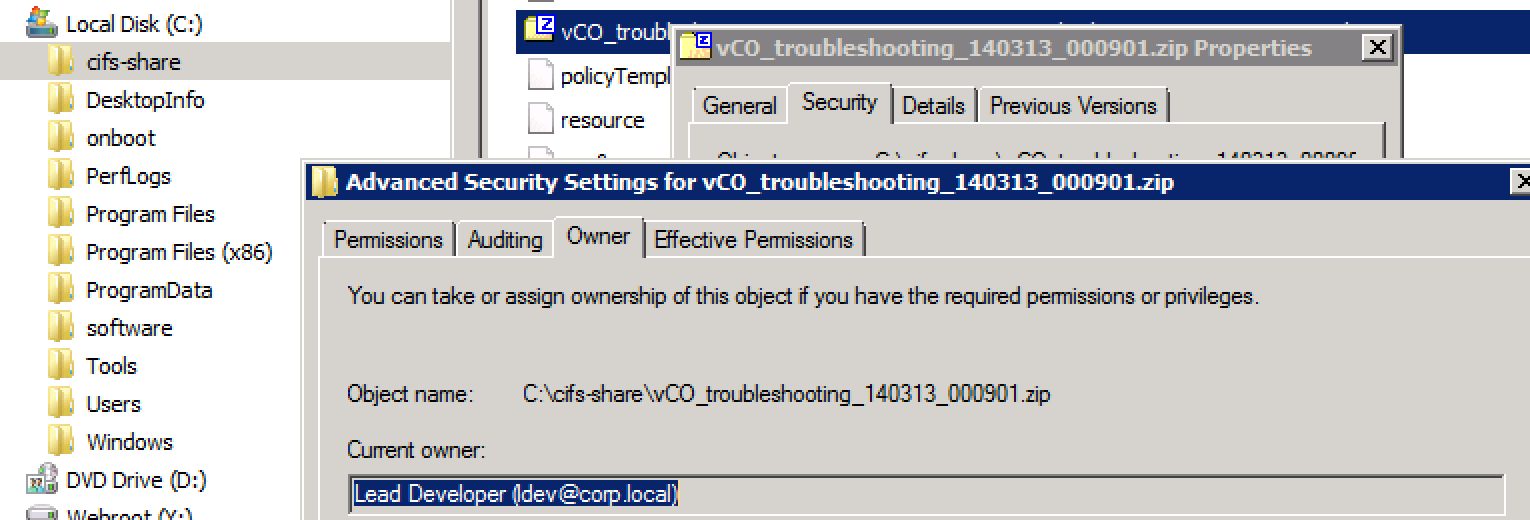
vCO Exported files have desired owner set
We see here in the screenshot above that each of the files “owner” is the “ldev” account that we configured vCO to use when connecting to the share.
Summary:
As shown above, it only takes a few minutes of configuration and a service restart to get vCO to a point that it is capable of reading and writing files to a remote filesystem via a CIFS share. Now that the permissions and configuration are in place, you can use the FileWriter and other vCO features to access files on such shares.
Have fun!
UPDATE - 2017: If you wish to do this in a corporate environment, be sure to check out this post on Jonathan Medd’s Blog - Issues with Mounting a CIFS Share on the vRO Appliance

