Code snippets : Create your database plug-in

Need vCO to fetch some data from a database for integration purposes ? There is an easy solution with creating a plug-in ...
Jöerg Lew wrote an excellent article on the different options to integrate vCO with a database here. Creating a hibernate based plug-in is definitely the best way to map a database as vCO objects but it is a lot of effort and can get quite complex.
Since there is another much simpler way to create a database plug-in (with read only rights on the database) I thought I should share it.
First thing is to create your plug-in structure. Create a directory with a name and a "dar" extension.
In this directory create two directories: VSO-INF and resources. In VSO-INF create a text file name vso.xml. This is the file defining the plug-in interface.
Optionally add a 32x32 pixel picture in the resources directory. This is the picture that will be used in the vCO client.

Now edit the vso.xml file as follows.
This is an example on how to create your database plug-in:
|
|
Some explanations on the code:
- Module name: The prefix of all the objects in this plug-in.
- Display name: The name that will show up in vCO configuration.
- version, build: Used by the vCO configuration to update on new version.
- Image: The image you have in the resources directory, used as the icon for the plug-in.
- Description: Will show up in the API explorer.
- Dynamic Enumeration logEvent: This is an object of the plug-in.
- Datasource type="jdbc" ... : This is where your object will be fetched from. Here it is with using the JDBC driver that allows to connect to Microsoft SQL Server, Oracle, PostgreSQL, mySQL and other databases (drivers must be downloaded separately). You will need to change the connection-url. You can generate this URL automatically and test it on your database with running the "JDBC URL generator" workflow in the workflow library. Make sure to set up your username and password as well.
- Datasource-select : This defines the data source for your object properties in the form of a SELECT statement
- datasource-id : This defines the ID of the object. this will be the one showing as a label once you have selected an object. It does not necessarily have to be an unique ID.
- datasource-entry: This defines the name of a property of an object, the matching column from the SELECT statement and the display name shown to the end user.
As you can see this is not very complicated and in my example I am fetching the vCO log events.
Once you have completed this copy the JDBCPlug-in.dar in [your vCO install directory]/app-server/server/vmo/plugins
Open your vCO web configure and go in the plug-ins tab. You should see this.

Restart your vCO service to enable the plug-in.
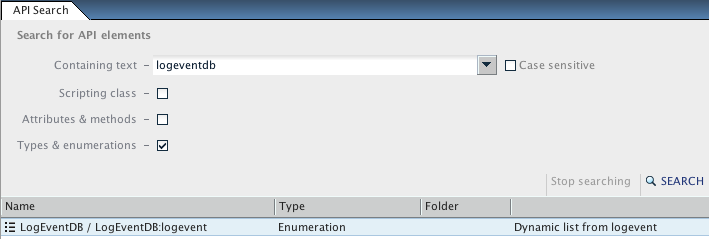
Open the vCO client. If you look in the inventory you will not see the plug-in since we have not created an inventory in the vso.xml. Create a new workflow, edit it, add a scriptable box. Click on Search API, enter logeventdb or the custom name you gave to your plug-in:

it will find the LogEventDB:logevent object. Double click on it.
It will show you the plug-in with the nice icon you had set in the first step and the LogEventDB:logevent object.

Now let's use it as an input parameter. Create a new workflow with a scriptable task. In the workflow inputs tab, add an input called "log", search for logEvent. You will find 2 objects: vCO native LogEvent and the one from your plug-in. Select yours.

Edit your scriptable task box to add the log input and enter the following script:
System.log(log.logtimestamp + " : " + log.shortdescription);
Link the elements, validate, save.
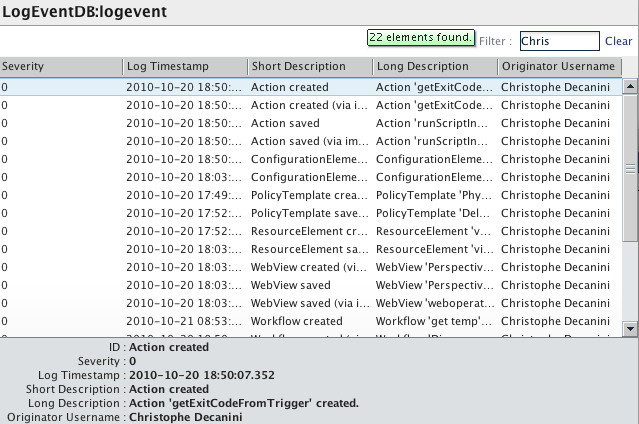
Start your workflow. Enter something in the filter (here I look for my username). You will see all the records from your SELECT statement listed. Select one and submit.

It will display the Log Timestamp and the short description as defined in the script. You could use any of the information in these columns to feed information into a workflow.

