Configure the AMQP plug-in to monitor vCloud Director
OK, so we told you about the great new plug-in that VMware has made available for vCO to work with AMQP, but now what? You'll need a couple things to get started before you can run off and code a bunch of cool workflows so let's step through this initial process...
- Get and Install AMQP Server (RabbitMQ)
- Configure Publisher (vCloud Director 1.5)
- Configure Consumer (vCenter Orchestrator)
- Apply Policy Template to create new Policy
- How to create new Policy manually
- Starting the Policy
Get and install an AMQP server.
For the tutorial I used a Debian based Linux and got rabbitMQ and installed it doing: sudo apt-get install rabbitmq-server
If you do not have an AMQP server yet you can do this or get RabbitMQ from here. There are versions for different platforms. If you did not install your AMQP broker yet you can follow these directions.
The AMQP plug-in documentation does not mention which versions are compatible. The plug-in was done using AMQP version 0-9-1 and tested against RabbitMQ. This tutorial was done using version 2.4 but newer version should work as well.
AMQP configuration
The AMQP installation provides a default configuration allowing to start the server and use it right away. This is what I used in this tutorial.
If you intend to run AMQP in production it is recommended to configure the server to make it secure.
Publisher Configuration
We need to feed the message bus. Configure your message publisher with your AMQP host information. In this tutorial vCloud Director 1.5 is used as the publisher.
Log in as a system administrator to vCloud Director (A tenant administrator cannot configure AMQP settings) and go to Administration / System Settings / Blocking Tasks. On the settings tab Enable Notifications and the AMQP Settings as follows (or differently if you customized the settings - be sure to use the FQDN or IP of your AMQP server).
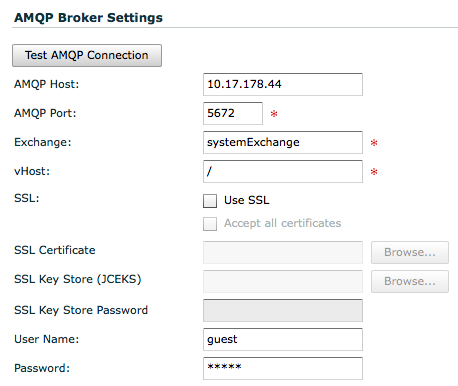
The default password is guest.
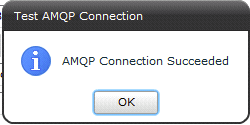
Once done, click on Test AMQP Connection. If successful your vCloud Director Server will now send notification messages for all kind of events.
Step by step AMQP consumer vCO configuration.
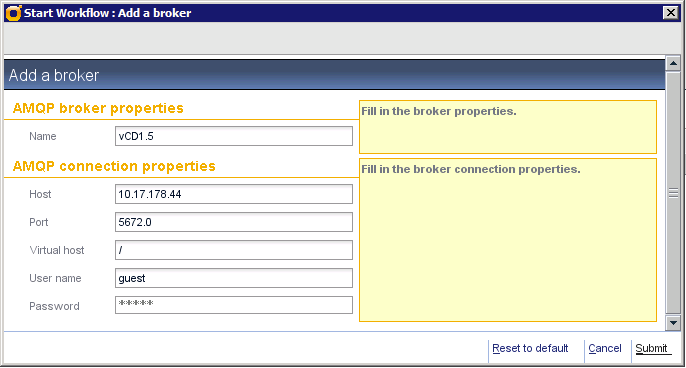
- Open your vCO client, search for the "Add a broker" workflow. Start it and set it as follows:
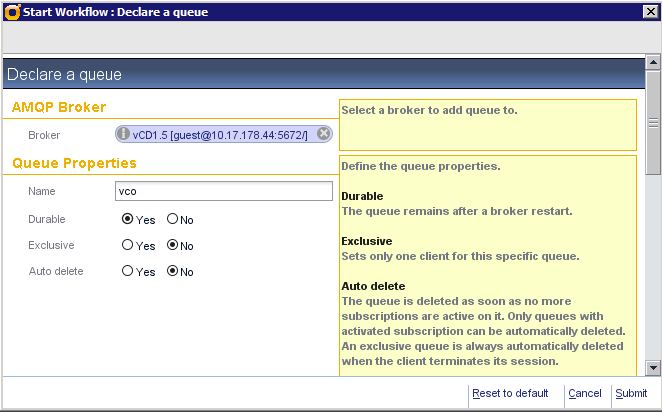
- This will create a new broker connection in the inventory. We are now going to declare a message queue for vCO. Search and start the "Declare a queue" workflow. Select the broker you have just created, name your queue and its options.
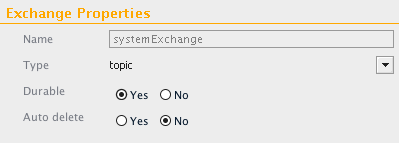
- The vCloud Director is publishing the messages to an Exchange named systemExchange. [edited] We do not need to declare an exchange since it was already declared by vCloud Director. It seems vCD does not necessarely declare the exchange. To make sure it is done declare it on vCO side run the "Declare an exchange" workflow and select the following options.
 [/edited]
- What we need to do next is to bind the systemExchange to the vCO queue. For this search for the "bind" workflow and declare the binding as follows:
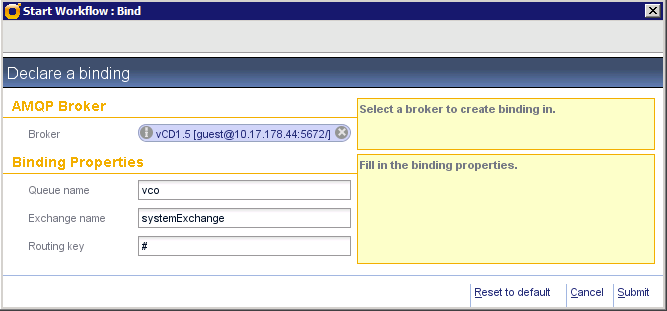
- The vCloud notification messages routing key has the following syntax format:
{operationSuccess}.{entityUUID}.{orgUUID}.{userUUID}.{subType1}.{subType2}...{subTypeN}.{taskName}
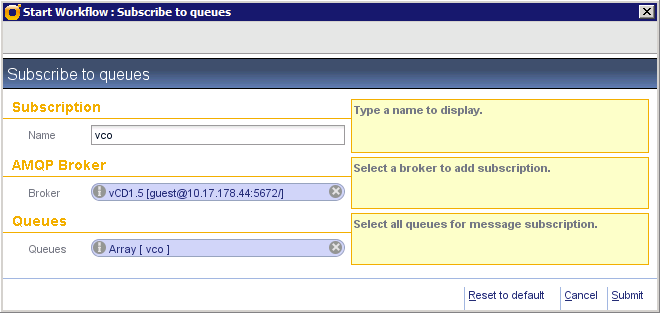
- Now that we have a vco queue we need to subscribe to it so the AMQP plug-in can receive new messages automatically. Search for "Subscribe to queues" workflow, start and set as follows:
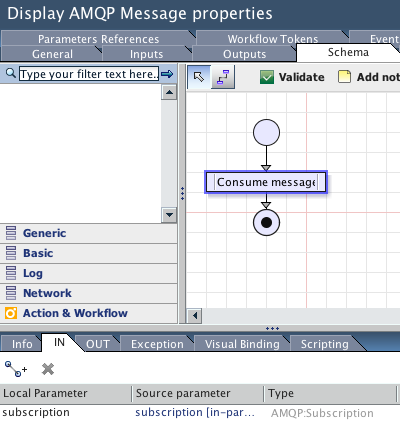
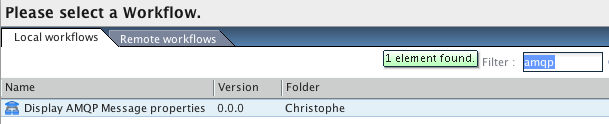
- Create a new workflow and call it "Display AMQP Message properties". Edit the workflow.
- Add an input parameter "subscription" of type AMQP:Subscription.
- Add a Scriptable task (Generic tab), rename it "Consume message"
- Link the subscription input as input to the scriptable task
- Copy the following code into it.
1
2
3
var props = subscription.retrieveLastOnMessageTrigger(); var messageBody = props.get('body'); var headers = props.get('headers'); var properties = props.get('properties'); System.log("notification.type : " + headers.get("notification.type")); System.log("notification.orgUUID : " + headers.get("notification.orgUUID")); System.log("notification.entityType : " + headers.get("notification.entityType")); System.log("notification.entityUUID : " + headers.get("notification.entityUUID")); System.log("notification.userUUID : " + headers.get("notification.userUUID")); System.log("notification.operationSuccess : " + headers.get("notification.operationSuccess")+ "\n"); System.log("messageBody : " + messageBody + "\n"); System.log("receivedRoutingKey : " + properties.get("receivedRoutingKey")); System.log("messageCount : " + properties.get("messageCount")); System.log("deliveryMode : " + properties.get("deliveryMode")); System.log("priority : " + properties.get("priority")); System.log("deliveryTag : " + properties.get("deliveryTag")); System.log("contentType : " + properties.get("contentType")); System.log("contentEncoding : " + properties.get("contentEncoding")); System.log("receivedExchange : " + properties.get("receivedExchange")); System.log("contentLength : " + properties.get("contentLength")); - Add an end, link it, validate the workflow.
- Save and close. The workflow should look like below:
Now that we have a subscription to the message queue and a workflow to consume messages we need to create a policy starting this workflow on new messages. The AMQP Plug-in provides a Subscription Policy Template that we can apply.
Apply a Policy Template to create new Policy
- In the Policy Templates tab, expand out the tree to display the Library\AMQP\Subscription entry
- Right click on the Subscription Policy Template and click Apply Policy
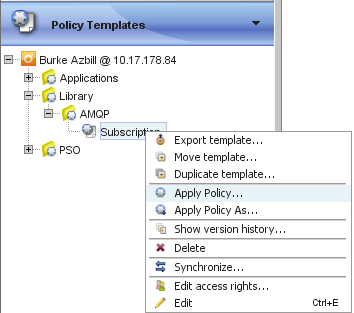
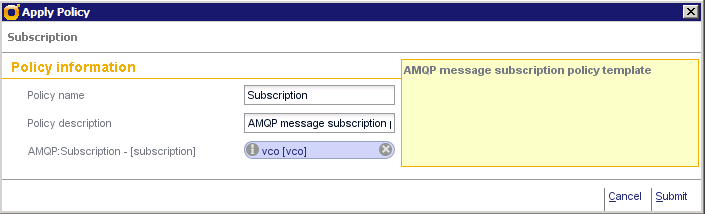
- When prompted for the inputs, select your vco Subscription that was created earlier, for the first two fields you may keep the defaults. Click Submit when done:
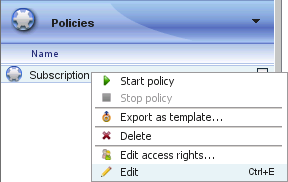
- Next, the new policy must be edited to specify which workflow is to be executed. Click the Policies tab on the left, then select and edit the Subscription policy:
- On the General tab, for startup: Select On server startup, start the policy. This tells vCO to start the policy each time the server is started or rebooted.
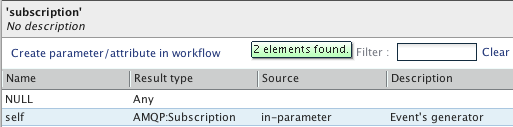
- Next, click on the Scripting tab, then select the OnMessage trigger event. In the bottom pane, click the magnifying glass icon to browse for and select the Display AMQP Message properties workflow that was created earlier.
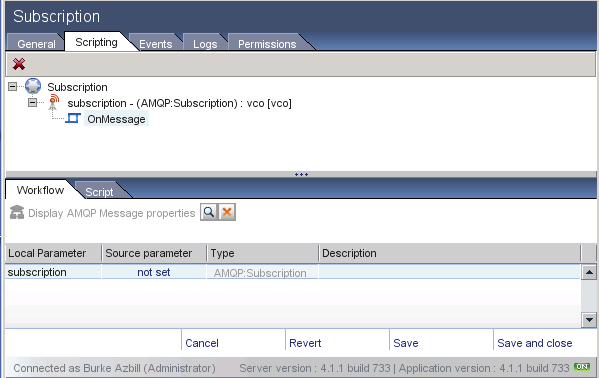
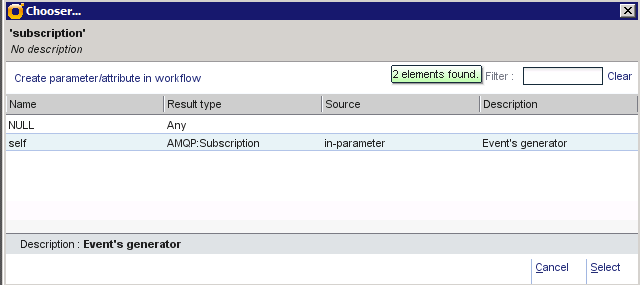
- Under the Source Parameter column, click not set and use the chooser to set that value to self:
- Once you have the Subscription specified, you may click Save and Close
To Create a new Policy Manually
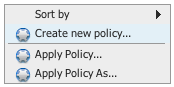
- In the policy tab right click / Create a new policy
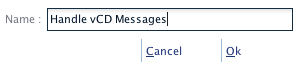
- Name it as such:
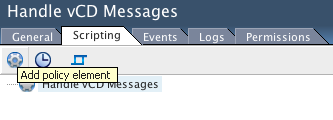
- Click on "Add policy element" (gear icon on the left)
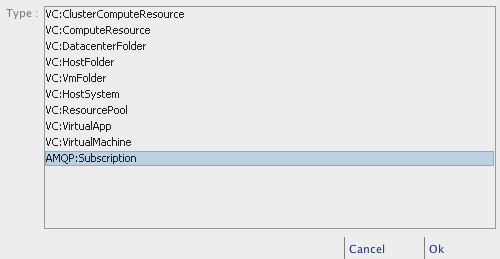
- Select AMQP:Subscription for type (the list below may vary depending on which plug-in is active on your server)
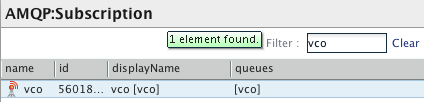
- Type vco in the Filter to find the vco subscription you created previously.
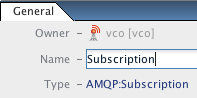
- Rename the policy element to "Subscription"
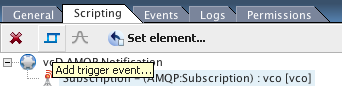
- With Subscription selected click on "Add trigger event..."
- Select "onMessage:

- Type "amqp in the filter" and select the workflow you have created to consume the message.
- Click on the workflow "not set: workflow parameter

- Select "self"
- On the general tab you can optionally set your policy to start on server startup.
- Save and close.
Starting the Policy
- Right click on policy / start.
- Check the policy log tab to see if workflows where started.
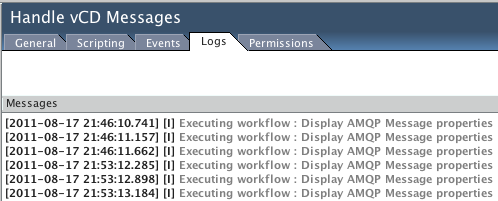
- Open the "Display AMQP Message properties" workflow logs tab on the workflow runs to check the content of the messages.
You should see something like this:
[2011-08-17 21:55:54.724] [I] Started from policy : Handle vCD Messages [2011-08-17 21:55:54.893] [I] notification.type : com/vmware/vcloud/event/task/complete [2011-08-17 21:55:54.894] [I] notification.orgUUID : 853ebd05-a19a-438e-9d85-1b528c69ca12 [2011-08-17 21:55:54.894] [I] notification.entityType : com.vmware.vcloud.entity.task [2011-08-17 21:55:54.894] [I] notification.entityUUID : 634a2aaa-0e4c-47c5-9ad7-dc20df251f83 [2011-08-17 21:55:54.894] [I] notification.userUUID : c1d18808-7685-439b-84b5-654862c0f5c0 [2011-08-17 21:55:54.895] [I] notification.operationSuccess : false [2011-08-17 21:55:54.895] [I] messageBody :
2011-08-17T15:44:35.573-04:00
false
2011-08-17T15:44:35.573-04:00 false [2011-08-17 21:55:54.895] [I] receivedRoutingKey : false.634a2aaa-0e4c-47c5-9ad7-dc20df251f83.853ebd05-a19a-438e-9d85-1b528c69ca12.c1d18808-7685-439b-84b5-654862c0f5c0.com.vmware.vcloud.event.task.complete.vappDeploy [2011-08-17 21:55:54.895] [I] messageCount : 0 [2011-08-17 21:55:54.895] [I] deliveryMode : 2 [2011-08-17 21:55:54.896] [I] priority : 0 [2011-08-17 21:55:54.896] [I] deliveryTag : 18 [2011-08-17 21:55:54.896] [I] contentType : application/xml [2011-08-17 21:55:54.896] [I] contentEncoding : UTF-8 [2011-08-17 21:55:54.896] [I] receivedExchange : systemExchange [2011-08-17 21:55:54.897] [I] contentLength : 0
The first block is the information in the headers. It contains:
- the operation (here a task completed)
- the type of the object concerned (a task)
- the Universally Unique Identifiers for this task, the organization it belongs to and the user who started it
- the result of the operation (here the task failed)
Using the header is useful for triaging events to take different actions (for example log success, log errors and start a remediation workflow). The UUIDs can be useful for matching against the catalog of object stored in a CMDB.
The second block is the body of the message. It contains additional information such as:
- The URL link to the vCD server
- Links, names and IDs of the entity, user, org
- Time of the event
(Here the administrator unsuccessfully deployed a vApp 2011-08-17 15:44:35.573 US Eastern time in the organization Christophe). This allows to have basic human readable information without getting further information in a CMDB and optionally use the links to to get further information and take action on objects using the vCloud API.
The last block contains properties on the message such as the routing key and the exchange it was received from. This can be useful information to fine tune the binding between the exchange and queue to avoid handling messages that are of no interest.